In this short tutorial we will show how to configure the service SES (Simple Email Service) of the AWS (Amazon Web Services) and we are assuming that you have already created accounts both in AWS And if you haven’t already, just click on the links and register.
Follow the step by step and learn how to configure Amazon’s SES:
Steps to create SES on AWS
- AWS Login
- Access SES
- Choose Region
- Verify Domain
- Check the Shipping Email
- Create IAM User with programmatic access and assign AmazonSESFullAccess and AmazonSNSFullAccess permissions
- Ask Amazon to increase Shipping Volumes and withdraw your account from the SandBox.
Settings on Amazon AWS
1 – Enter Amazon AWS
– Go to the Amazon AWS Console page and Login.
site: https://aws.amazon.com/pt/console/
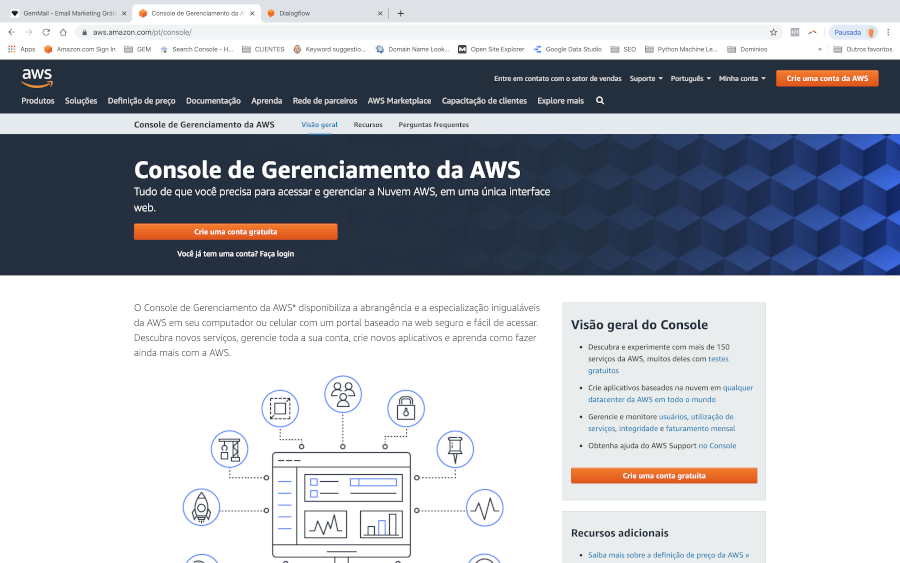
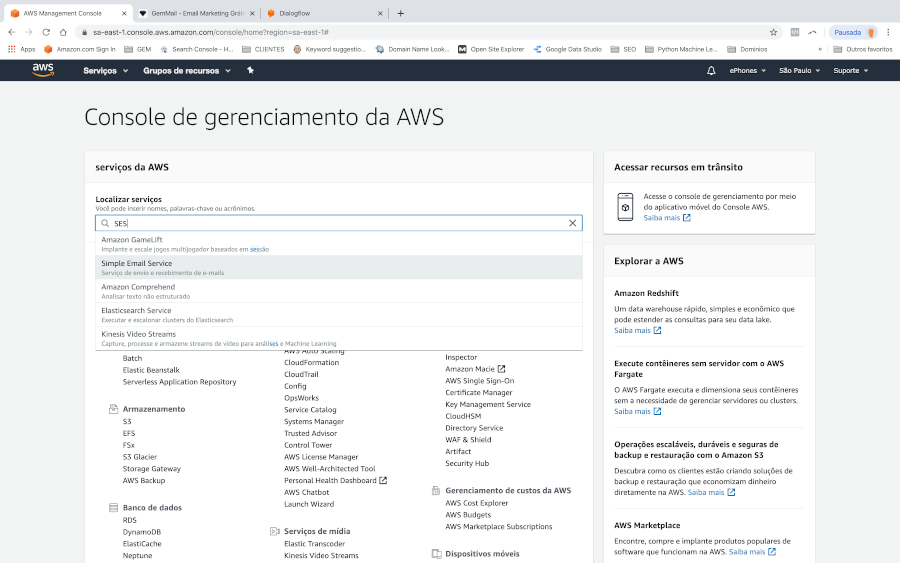
2 – Access the AWS Management Console
– Once logged in you will be in the dashboard or “AWS Management Console”, to make it easier, use the Service Locator and type “SES” in the search field. Select the SES – Simple Email Service and click on it.
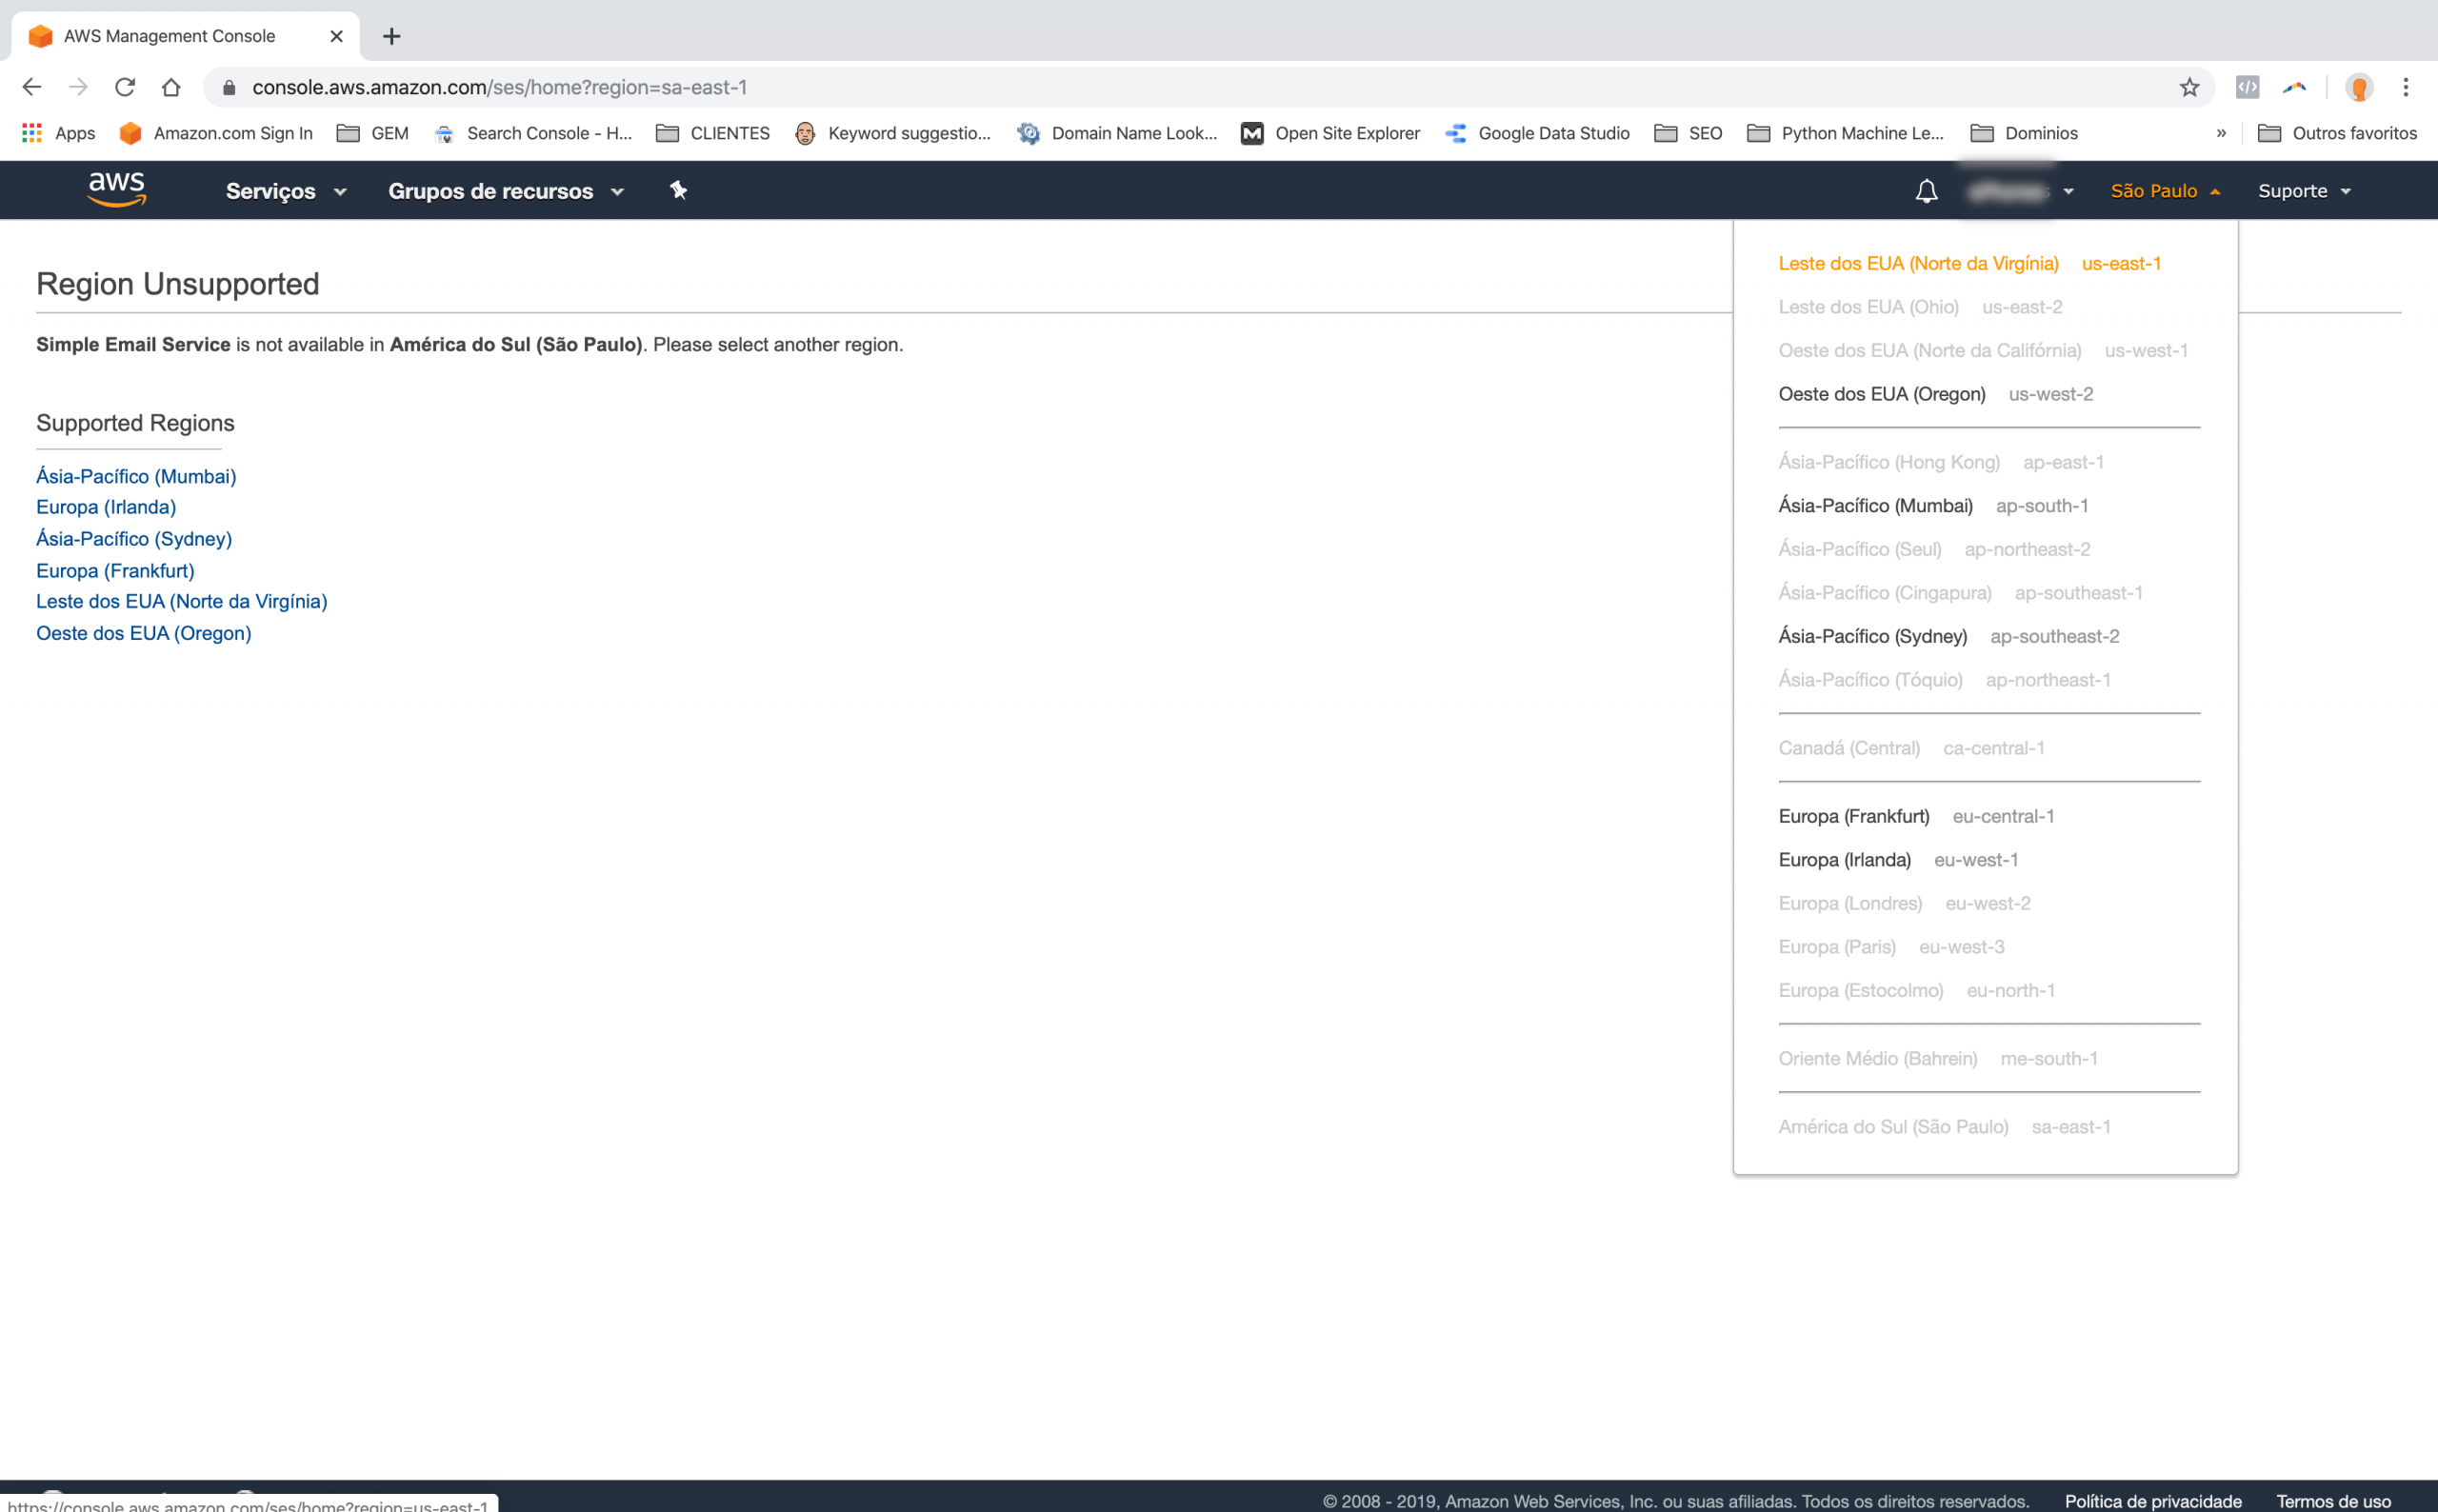
3 – Make sure you are in the correct region
– If you are in Brazil and already use an AWS service, it is possible that your region is marked as São Paulo, and if this is the case you will see an alert: – “Simple Email Service is not available in South America (São Paulo ). Please select another region. ”.
Calm down, this is not a problem.
If you see this alert, simply choose another region where the service is available. For example: Eastern USA (Northern Virginia) us-east-1. *
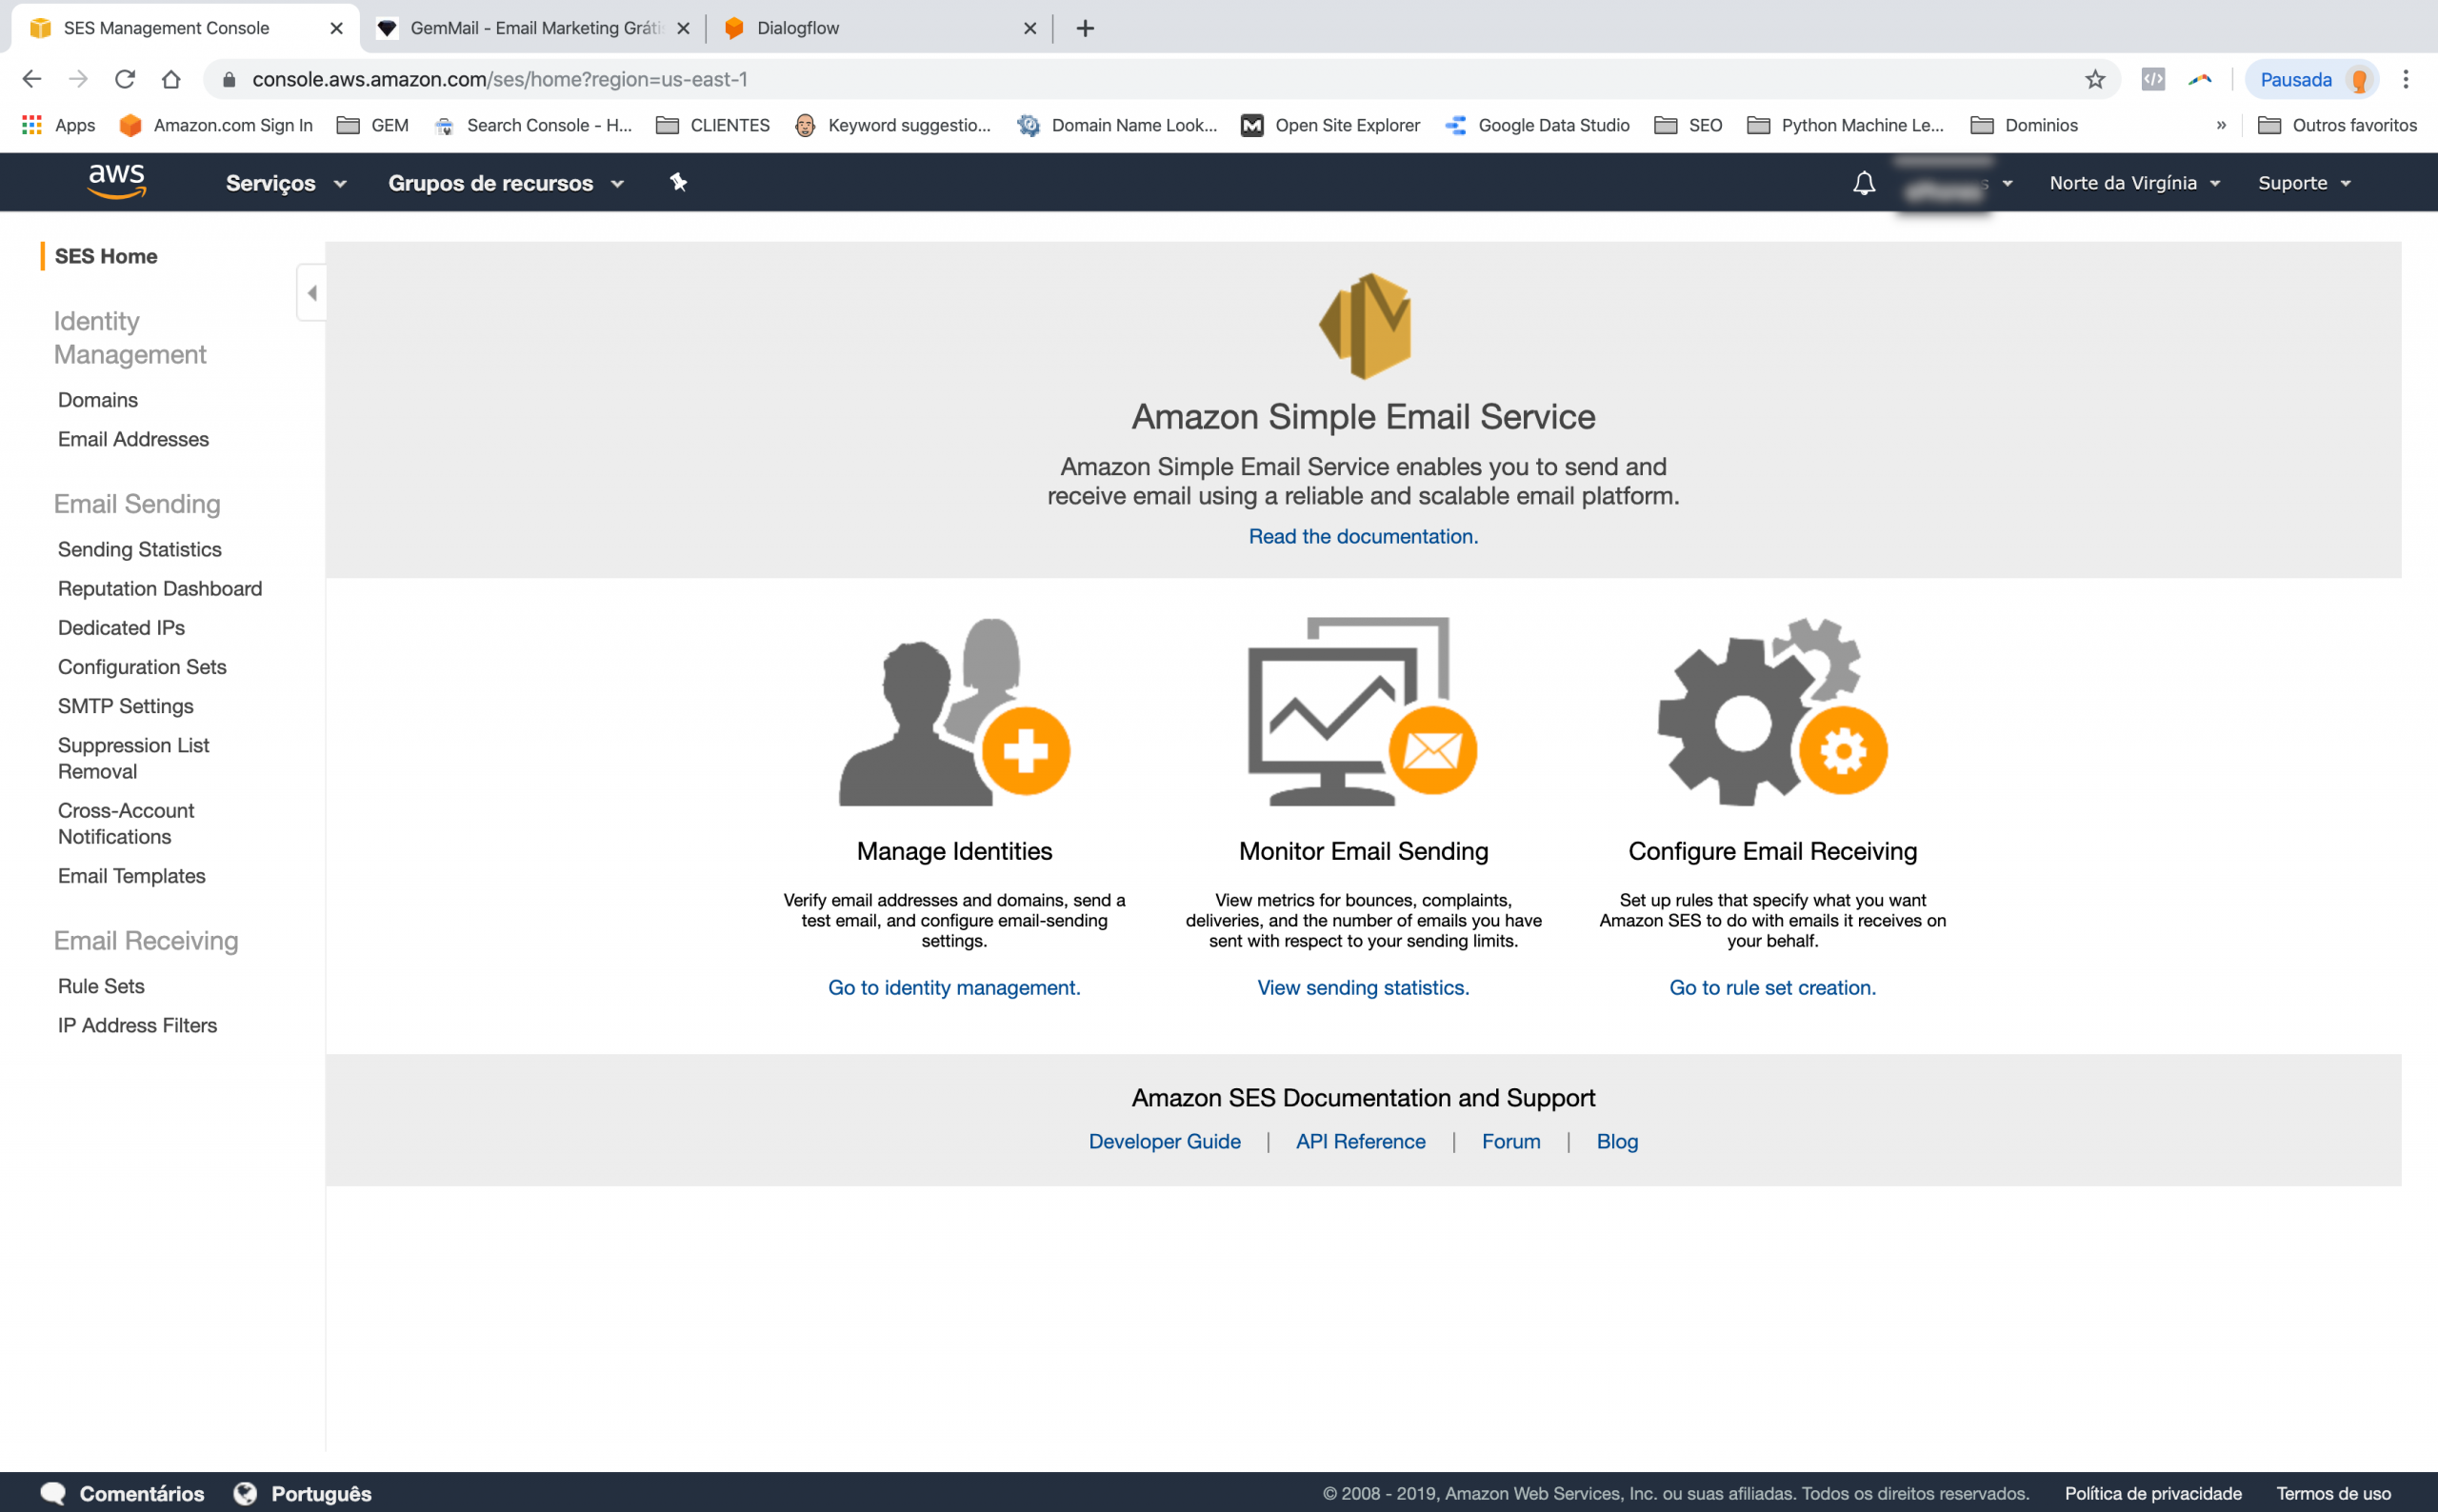
Once you have clicked, you will have access to the “Amazon Simple Email Service” panel.
* top menu on the right of the screen
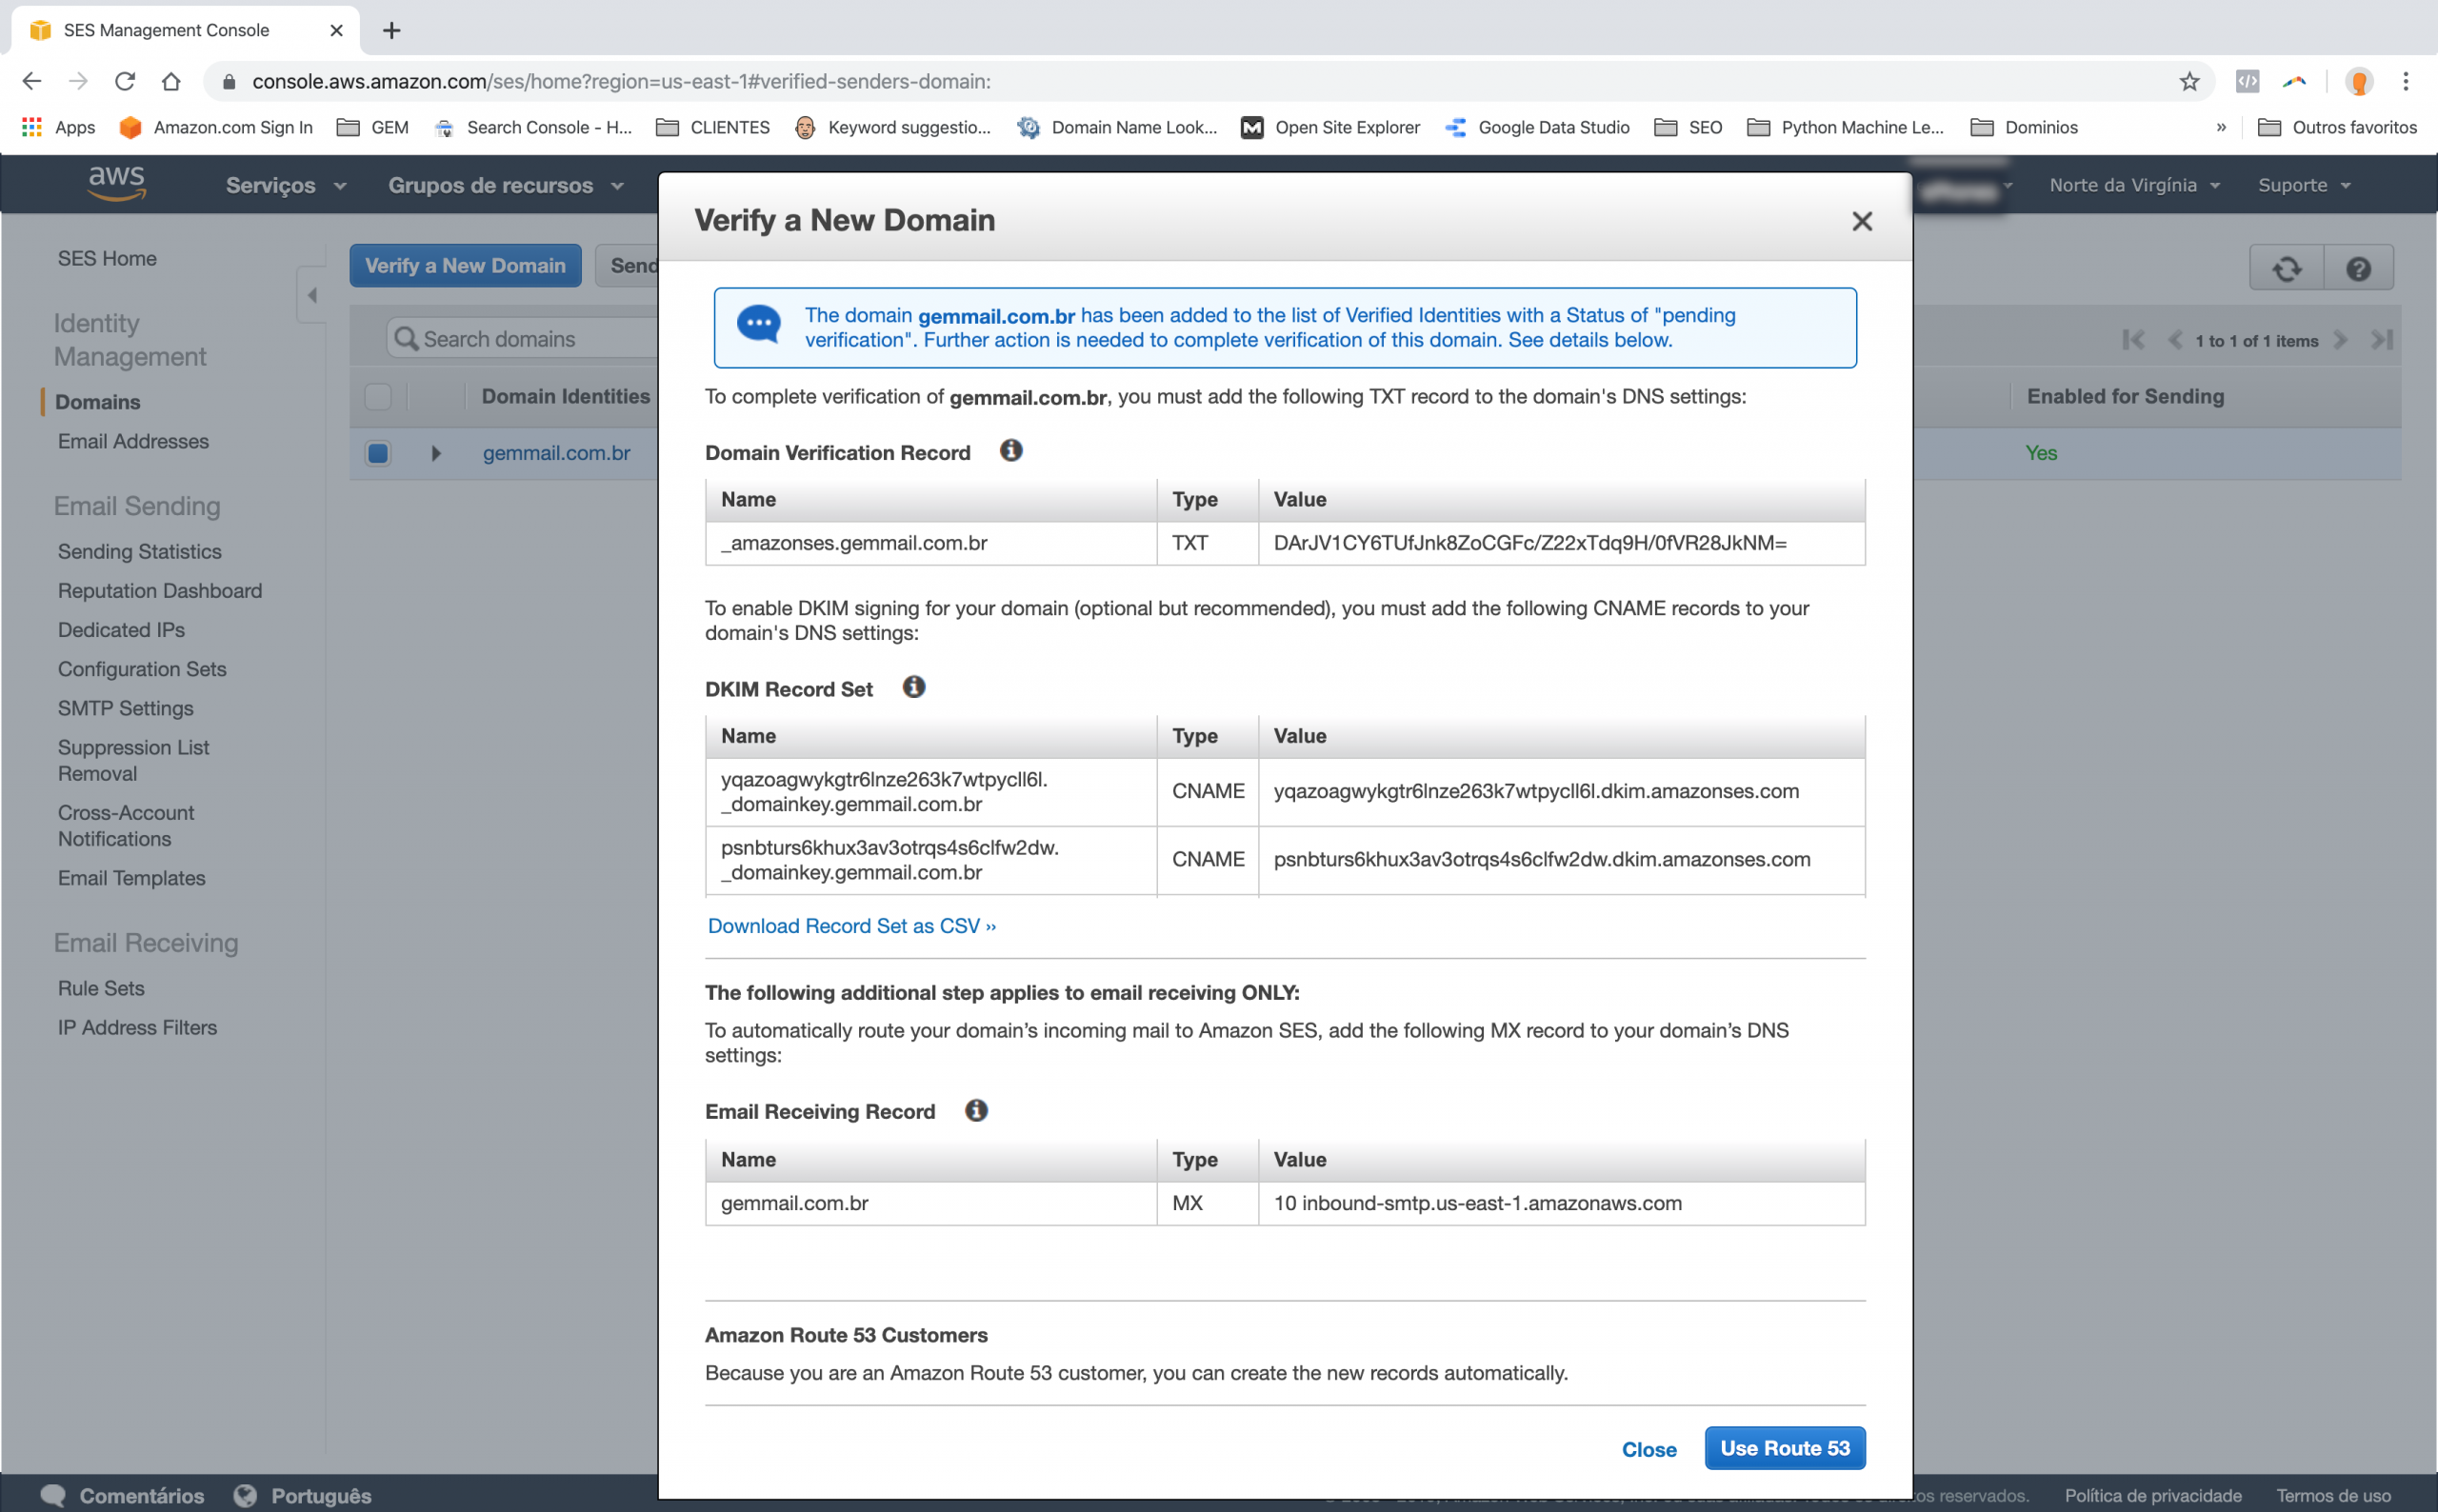
4 – Domains – Verifying a new domain.
– After clicking on the Virginia region, you should see the “Amazon Simple Email Service” panel.
– Click on “Manage Identities” or directly on Domains to register a domain.
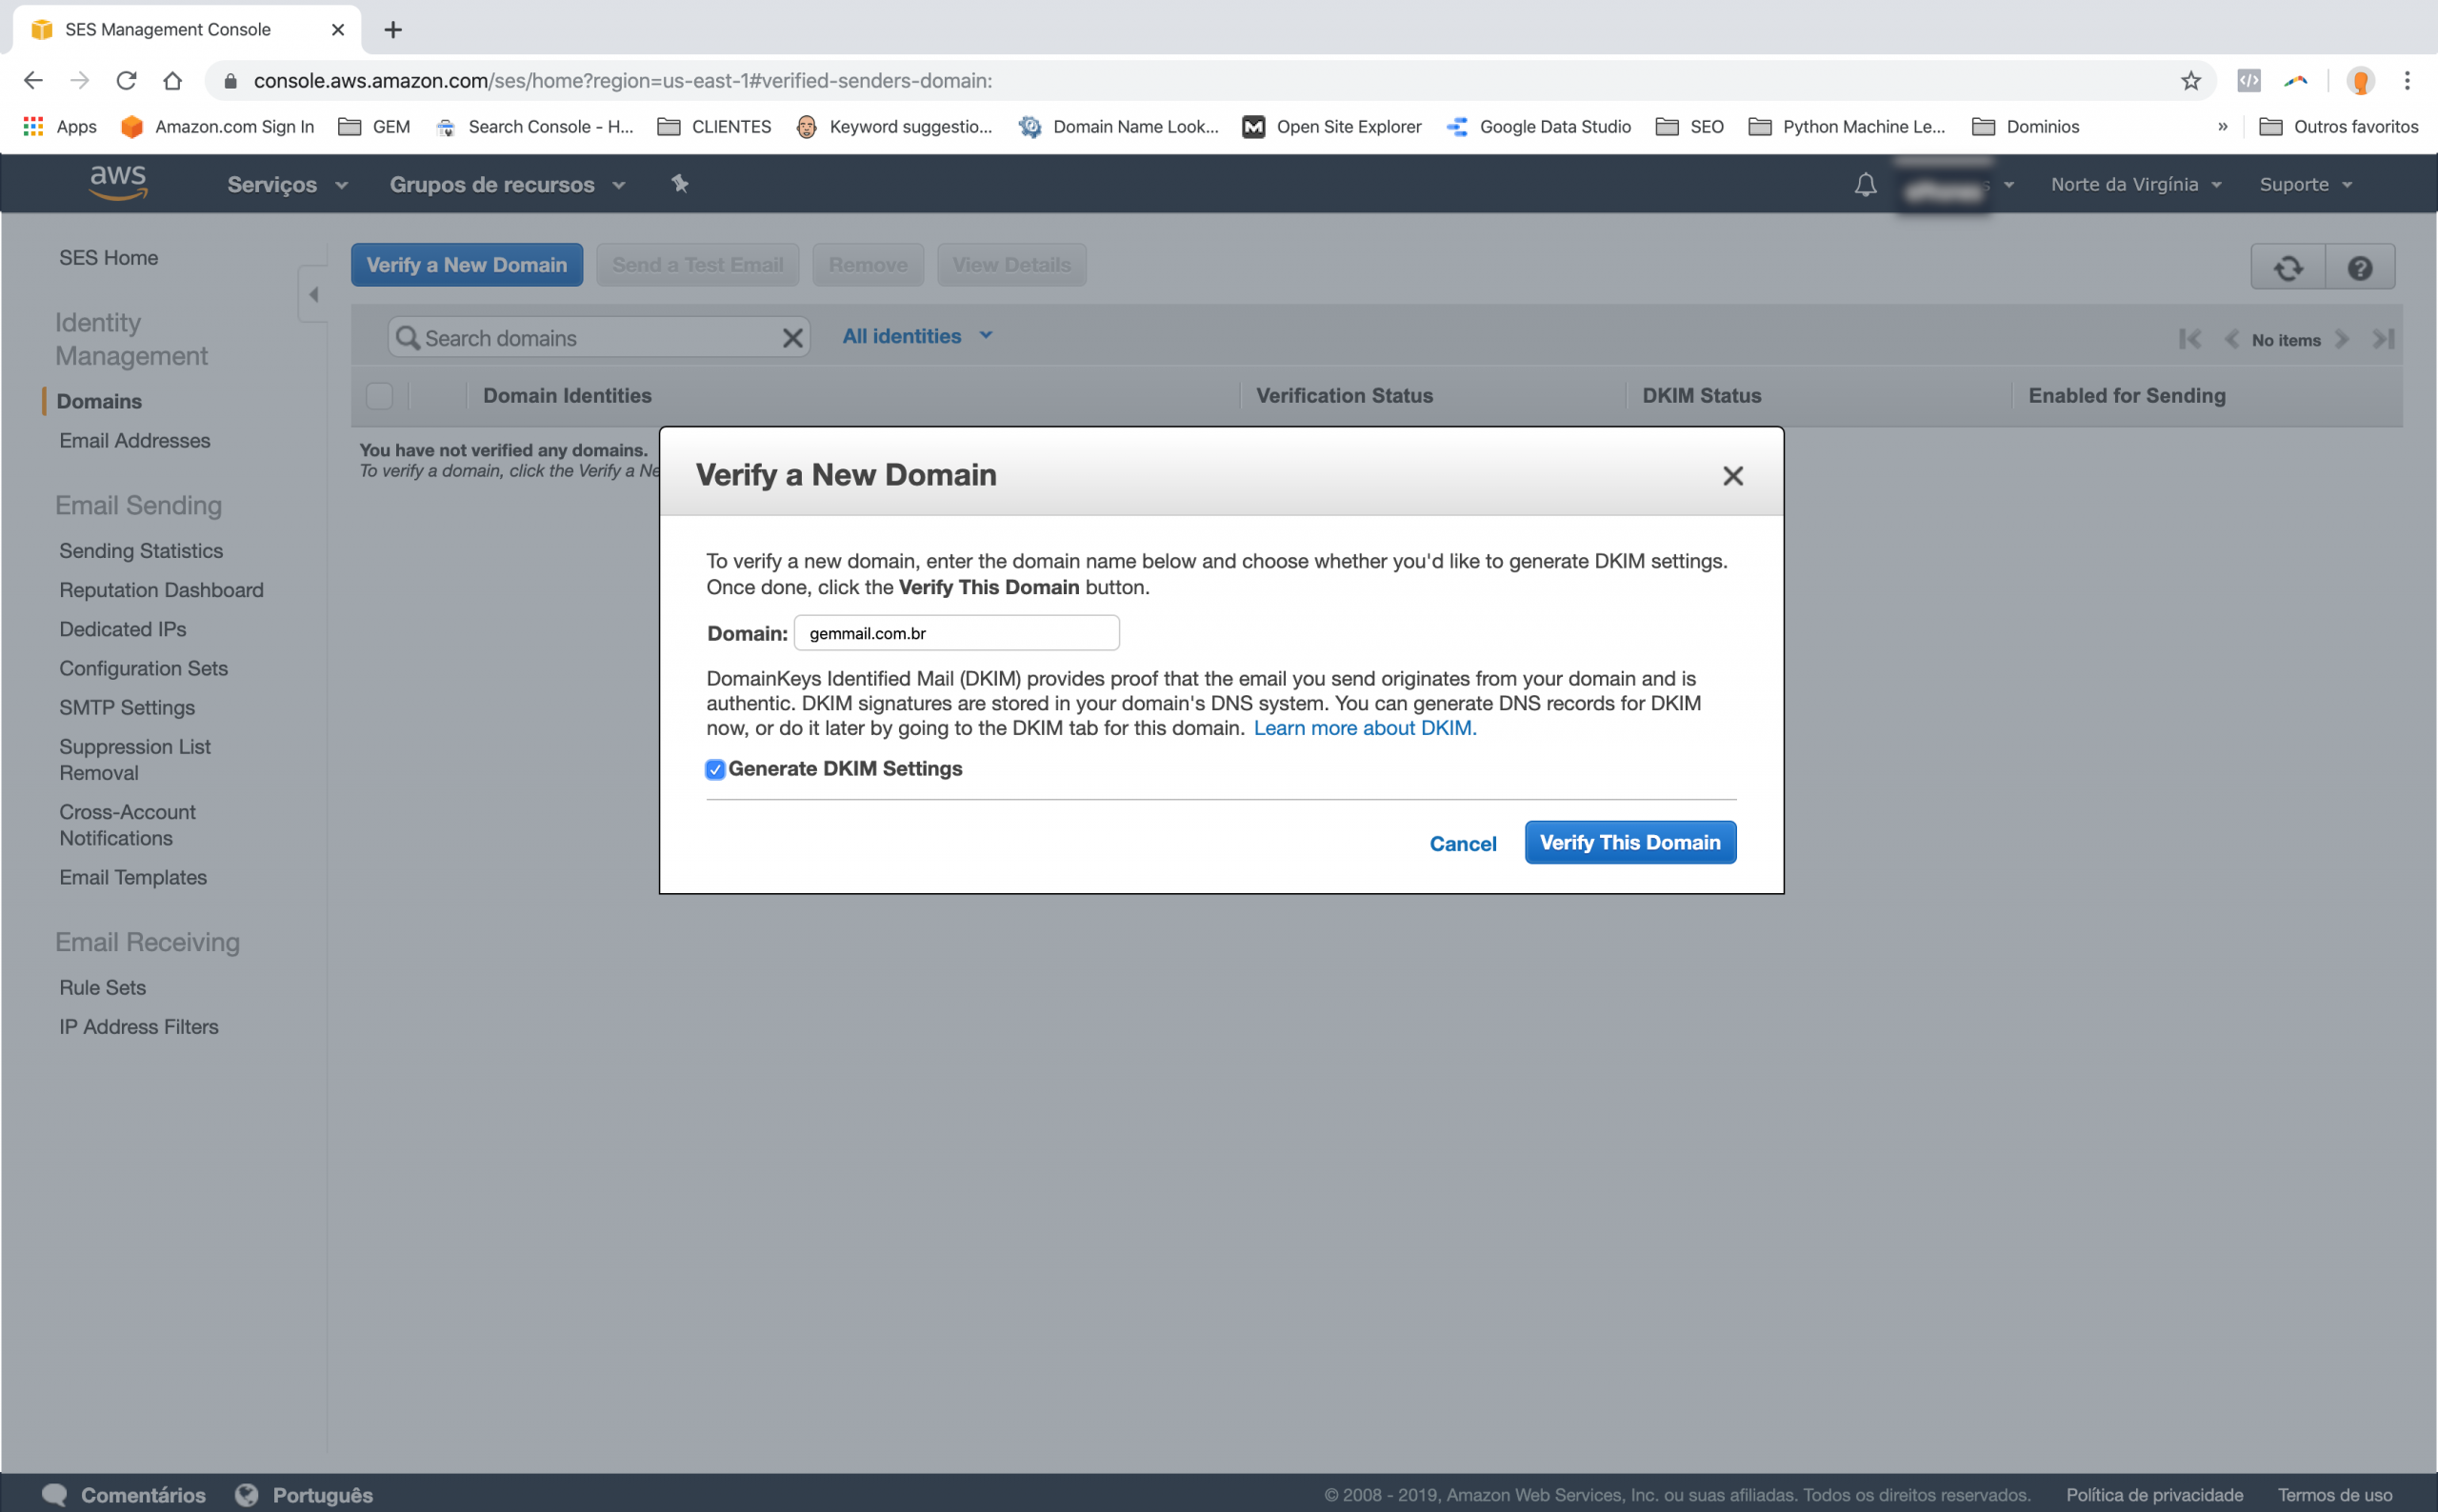
– Verify the Domain:
– Click on the blue button “Verify a new Domain”.
– Put the domain name in the “Domain” text field and select “Generate DKIM Settings”.
– Click on “Verify this Domain
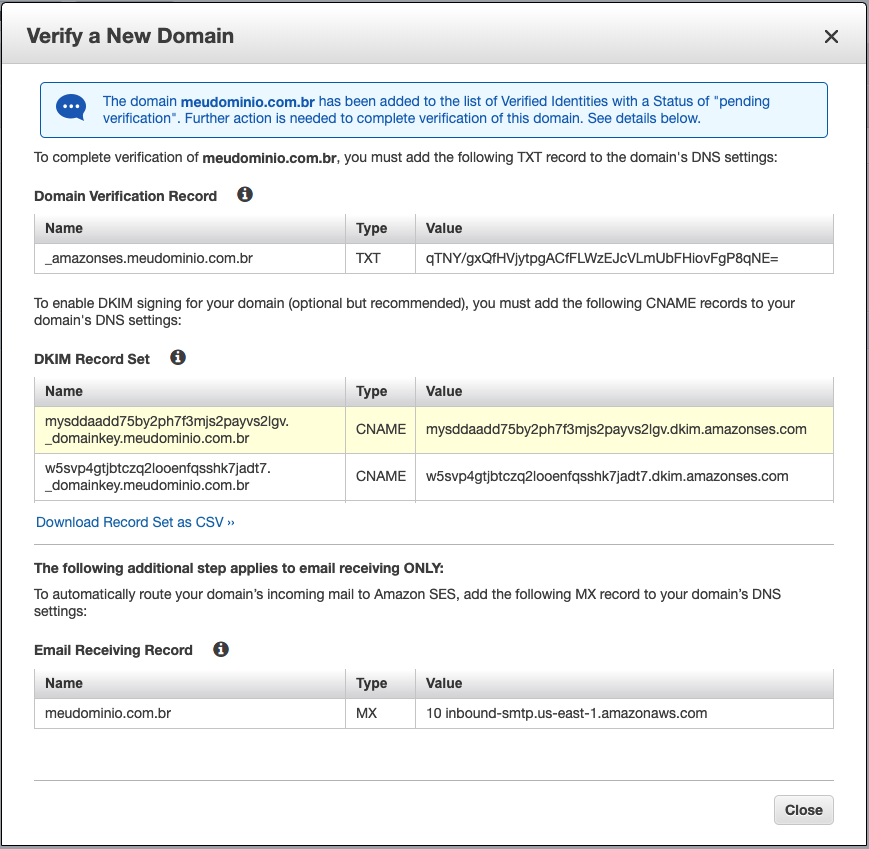
4.1 – Verify a New Domain – Finding DNS data for the new domain or delivery server.
– As soon as the popup opens, you will have access to the DNS information necessary for the validation of your domain as a GemMail delivery server.
You will need to enter this data in your hosting provider’s DNS settings to validate your domain, otherwise the Verification Status: “pending verification” will appear on the SES panel. As long as the status is unchecked, emails cannot be sent.
If you have closed the popup, you can access the DNS and DKIM data again through the panel.
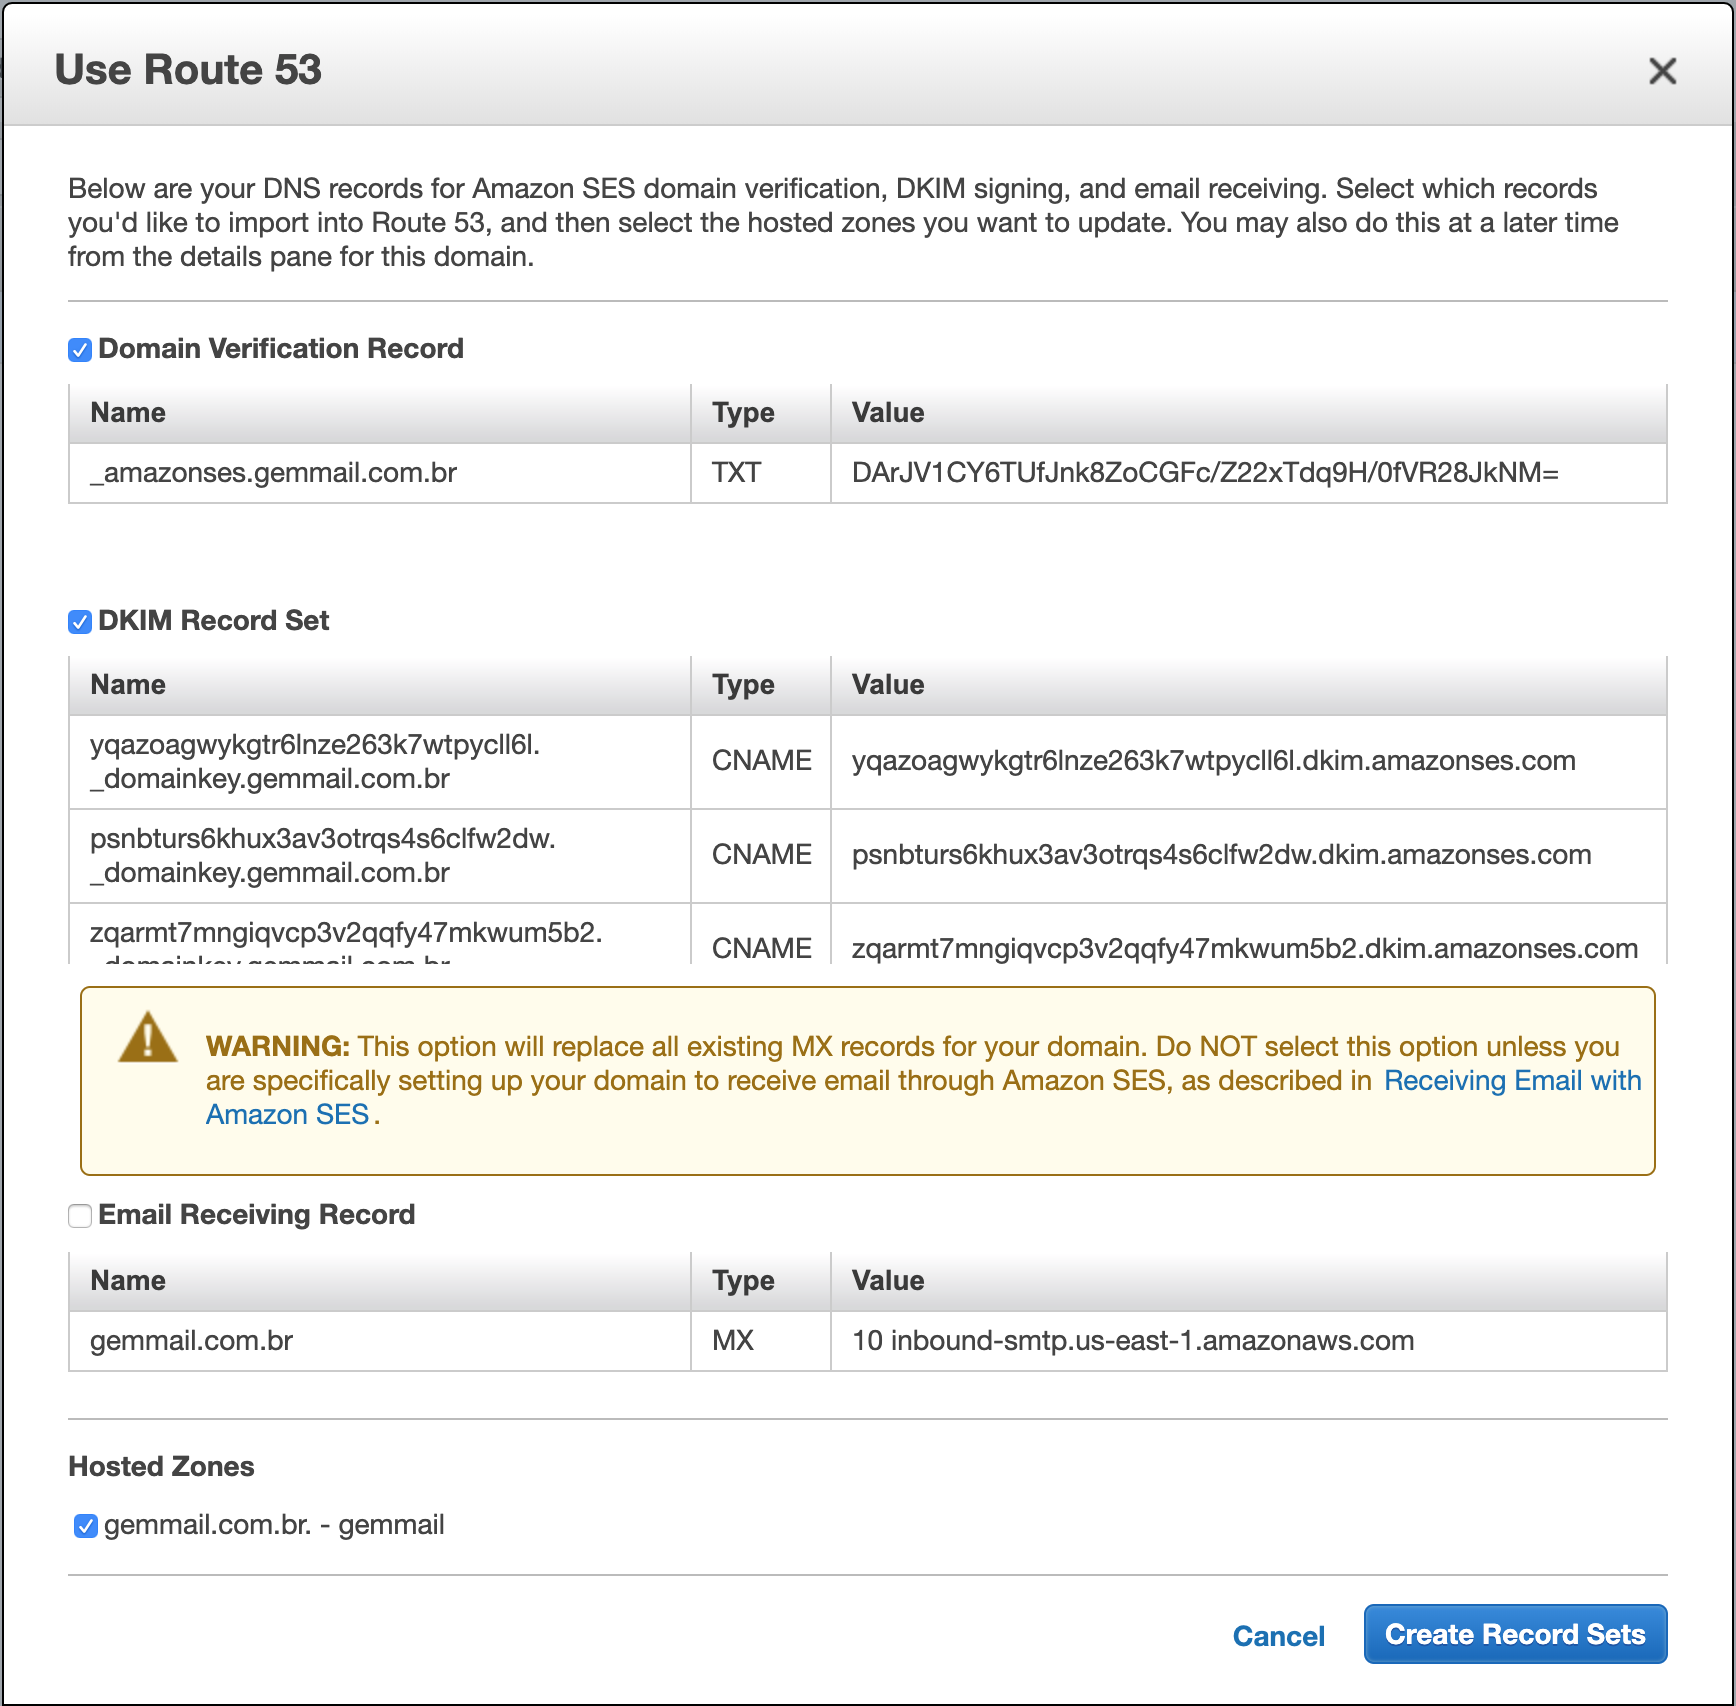
4.2 – Creating the Amazon SES DNS on Route 53
– Route 53 is the service that AWS offers to manage DNS Zones for your domain. If you or your company does not use this service, skip to Step # 6.
– If you already use AWS Route 53, configuration can be done automatically:
i. Click on the blue button “Use Route 53”
ii. Select “Hosted Zones” and click “Create Record Sets”.
In this case, the domain is released immediately and the DKIM registration keys can also be created automatically
If your site is not on Amazon and you are not using Route 53 to manage DNSs, check out the extra tutorial at the end of this article.
5 – Checking the Shipping Email
After you have validated your domain, it is time to validate the email that will be used to make the submissions.
In the SES panel, use the left side menu and access: Email Addresses> Verify a New Email Address (blue button).
Fill the popup with the desired email.
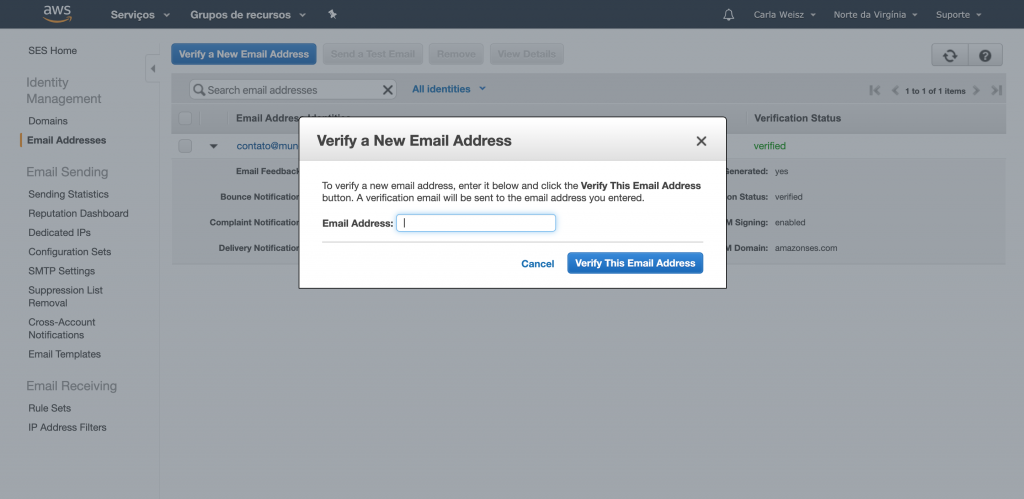
Amazon will send you a confirmation email. Open your webmail or email client, find your Amazon email and click the link to confirm.
There, your sending email is verified. Remember while you are on the Sandbox plan (it is practically a testing environment), you will only be able to send emails to and from verified emails in your account. If it didn’t make any sense to you. Relax, continue reading the tutorial.
6 – Create a user in IAM (Identity and Access Management)
Use the top Menu and click on Services to find the IAM panel. Once in the Panel, use the menu on the left side to create the group with the necessary permissions and the user who will have programmatic access. Whatever the order, but to make it easier, start with the user.
IAM> Access Management> User> Add User

Enter the desired username, click on the Access Types> Programmatic access checkbox.
Then click on the blue button: “Next: Permissions”.
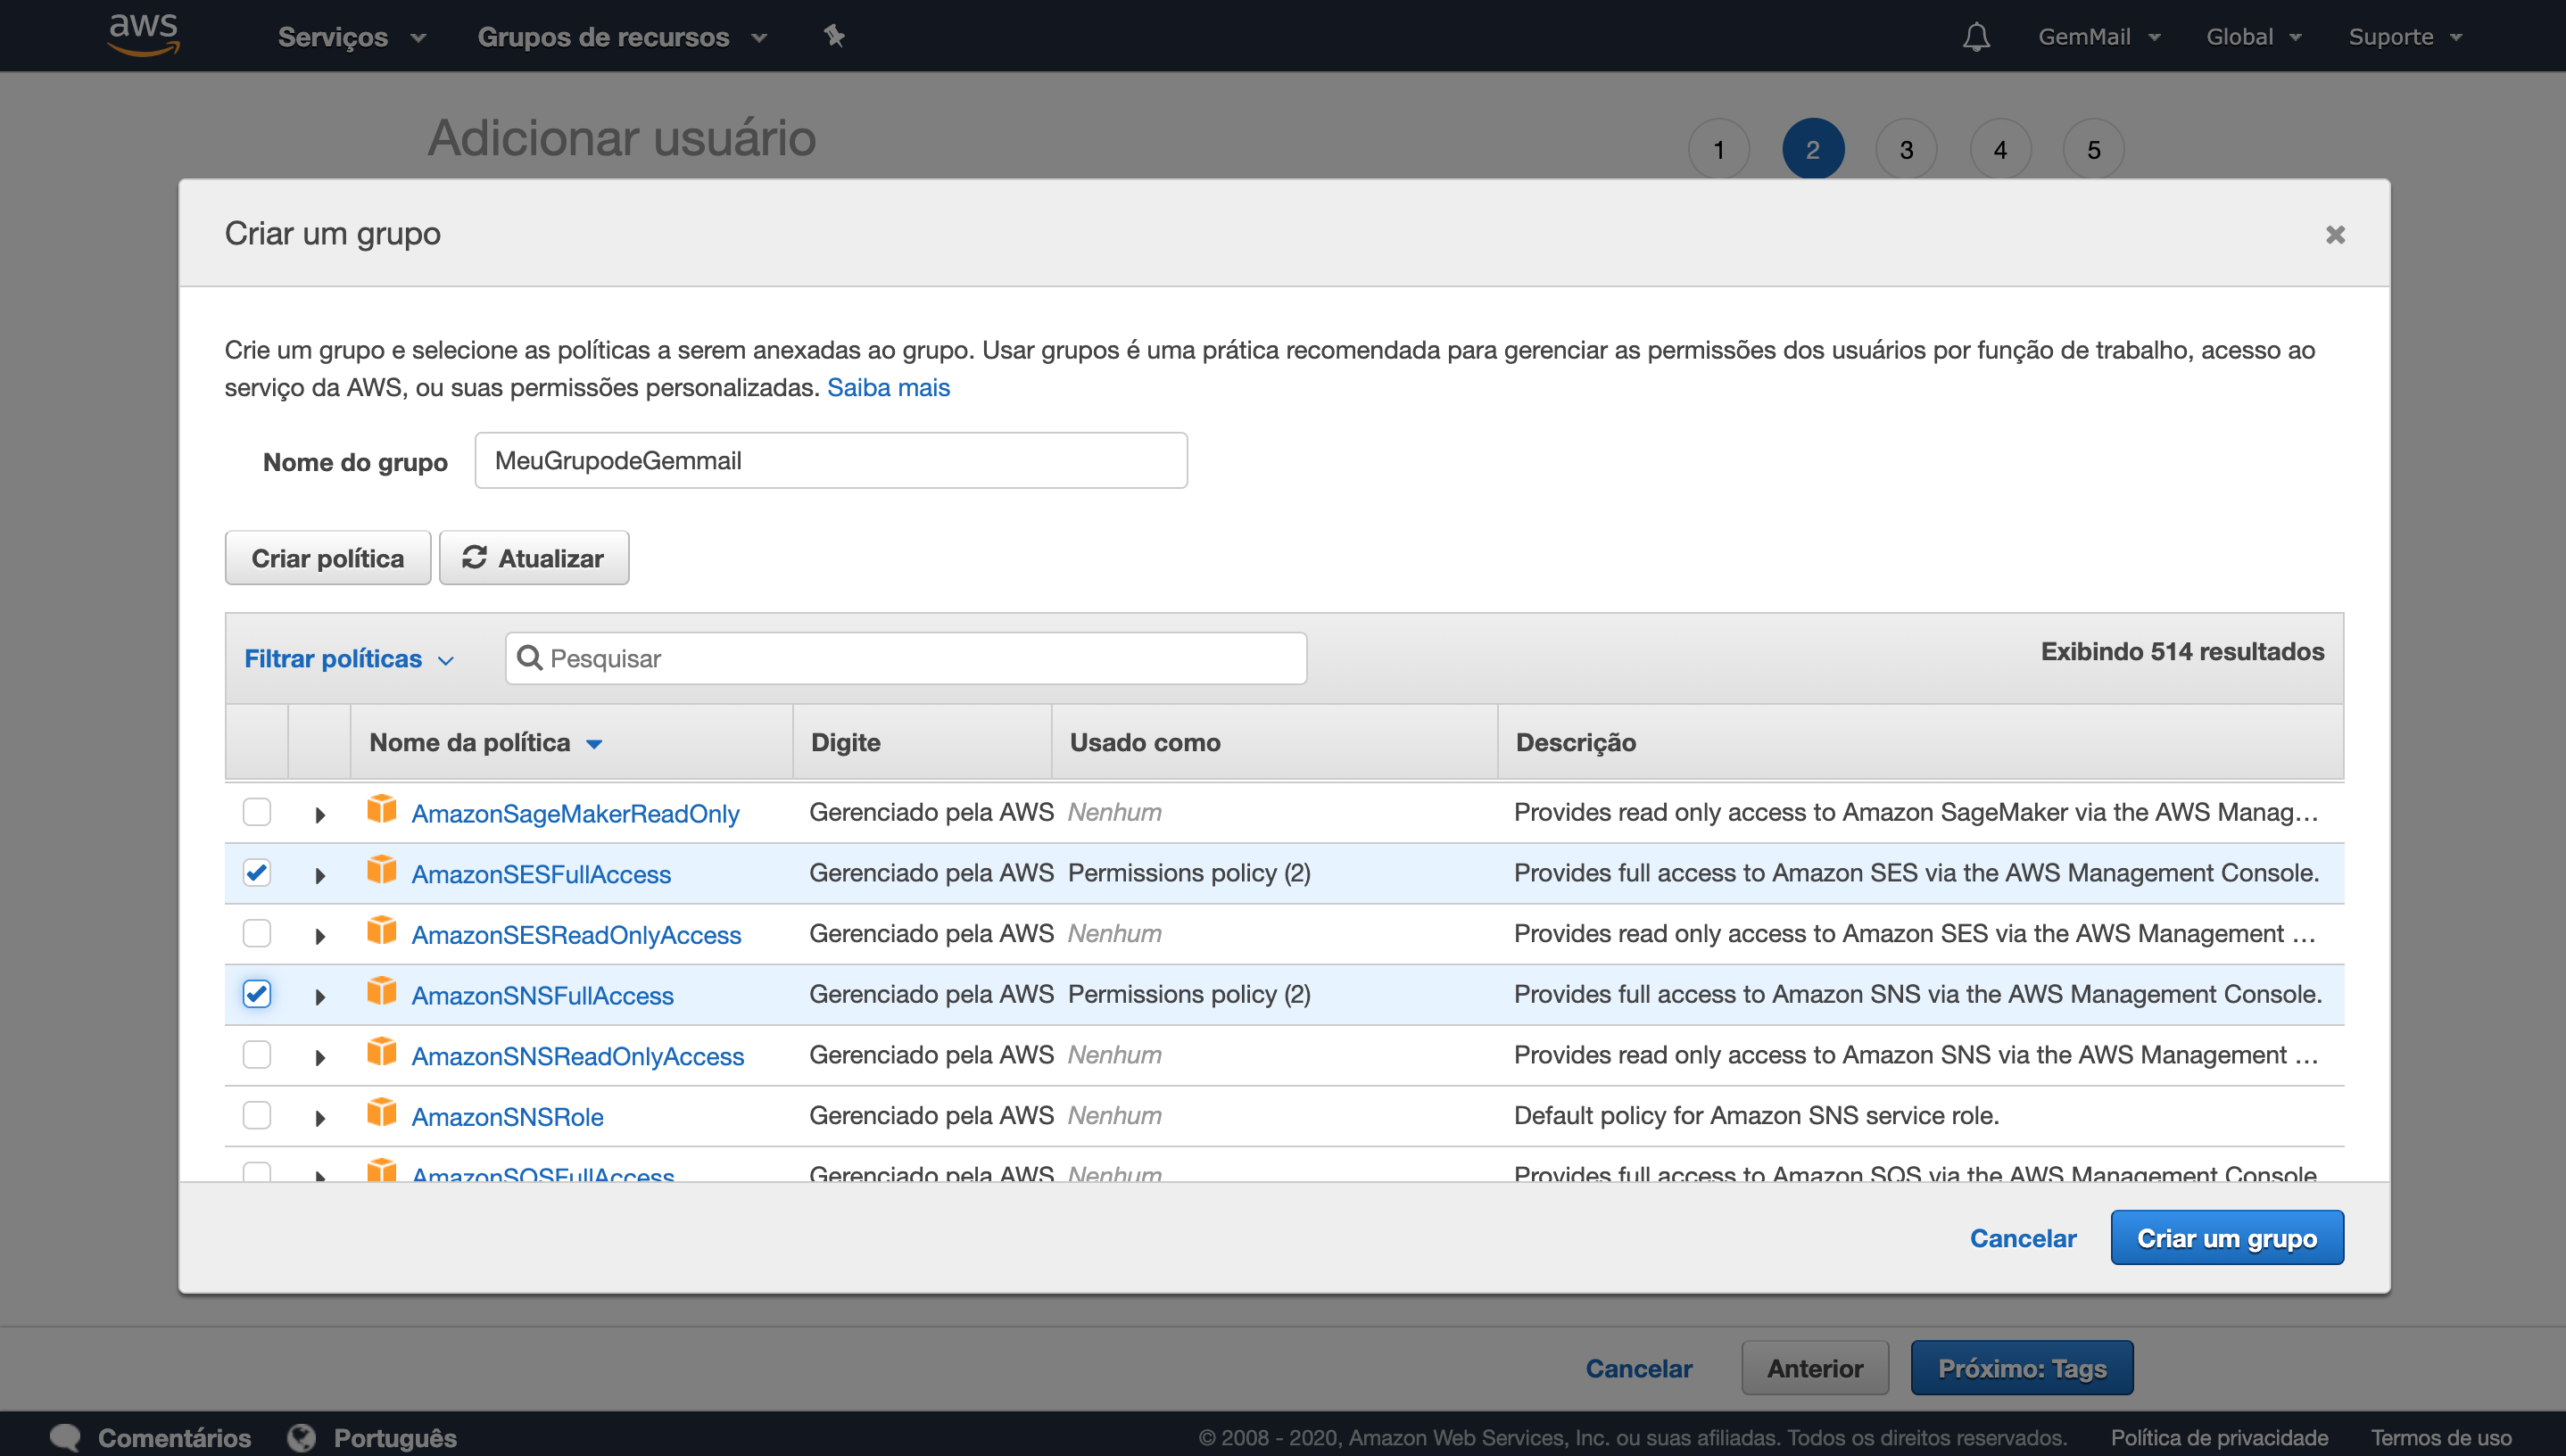
Create a new Group with the following policies: AmazonSESFullAccess and AmazonSNSFullAccess.
Click on create groups, ignore the creation of Tags from tab 3 (or use if you want, this is optional).
In tab 4 (review) just click on the blue button: “Create user”.
Then, a screen will appear (tab 5) showing that your user has been successfully created. Ready! Within AWS the settings are complete.
For security, download your access key and secret key (CSV).
You will need them to set up your delivery server within GEM.

Now all you need to do is ask Amazon to release you from the SandBox and increase your shipping limits.
7 – Bye Sandbox! – Increasing Shipping Limits on Amazon SES
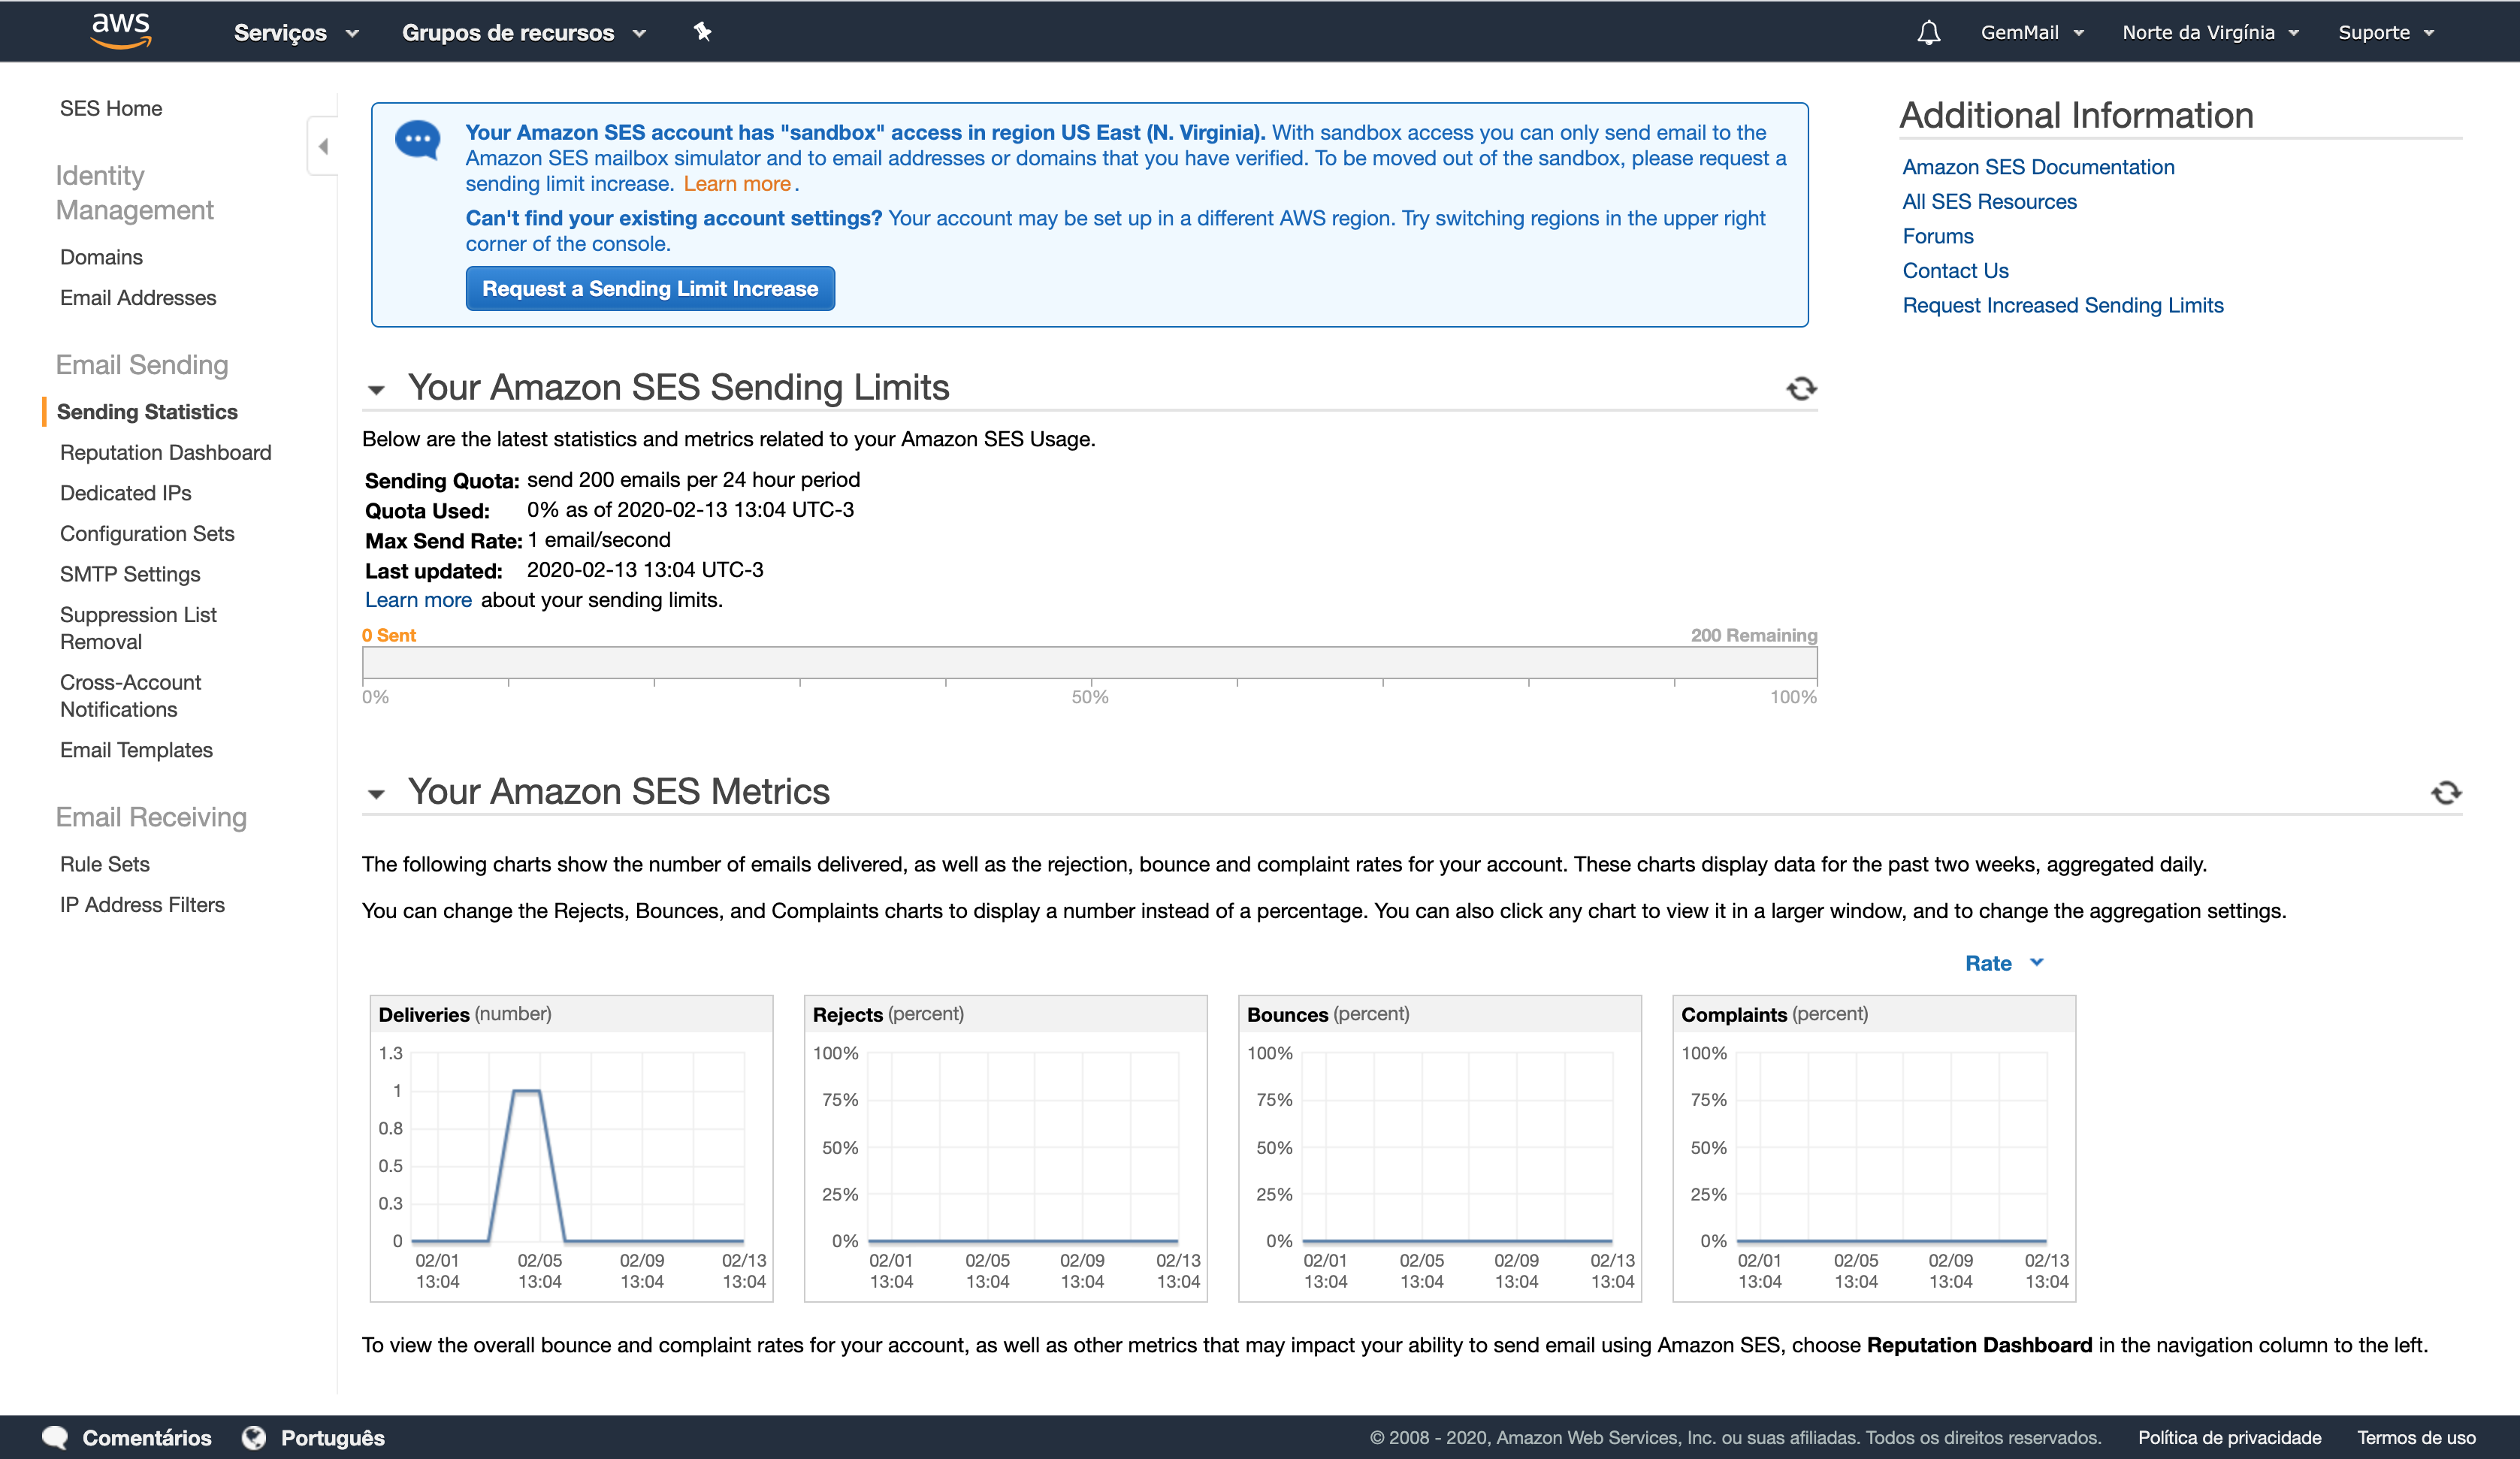
The entire configuration of Amazon SES is ready, however, according to the rules of Amazon, your account is still in the testing period and during this period you can only send emails from and to emails that are verified.
To get out of this, use the menu on the left side to find: Email Sending> Sending Statistics and click on the blue button “Request a Sending Limite Increase”.
As soon as you click the button you will enter the Amazon Support screen in the “Create Case” area. Keep the “Service Limit Icrease” box selected.
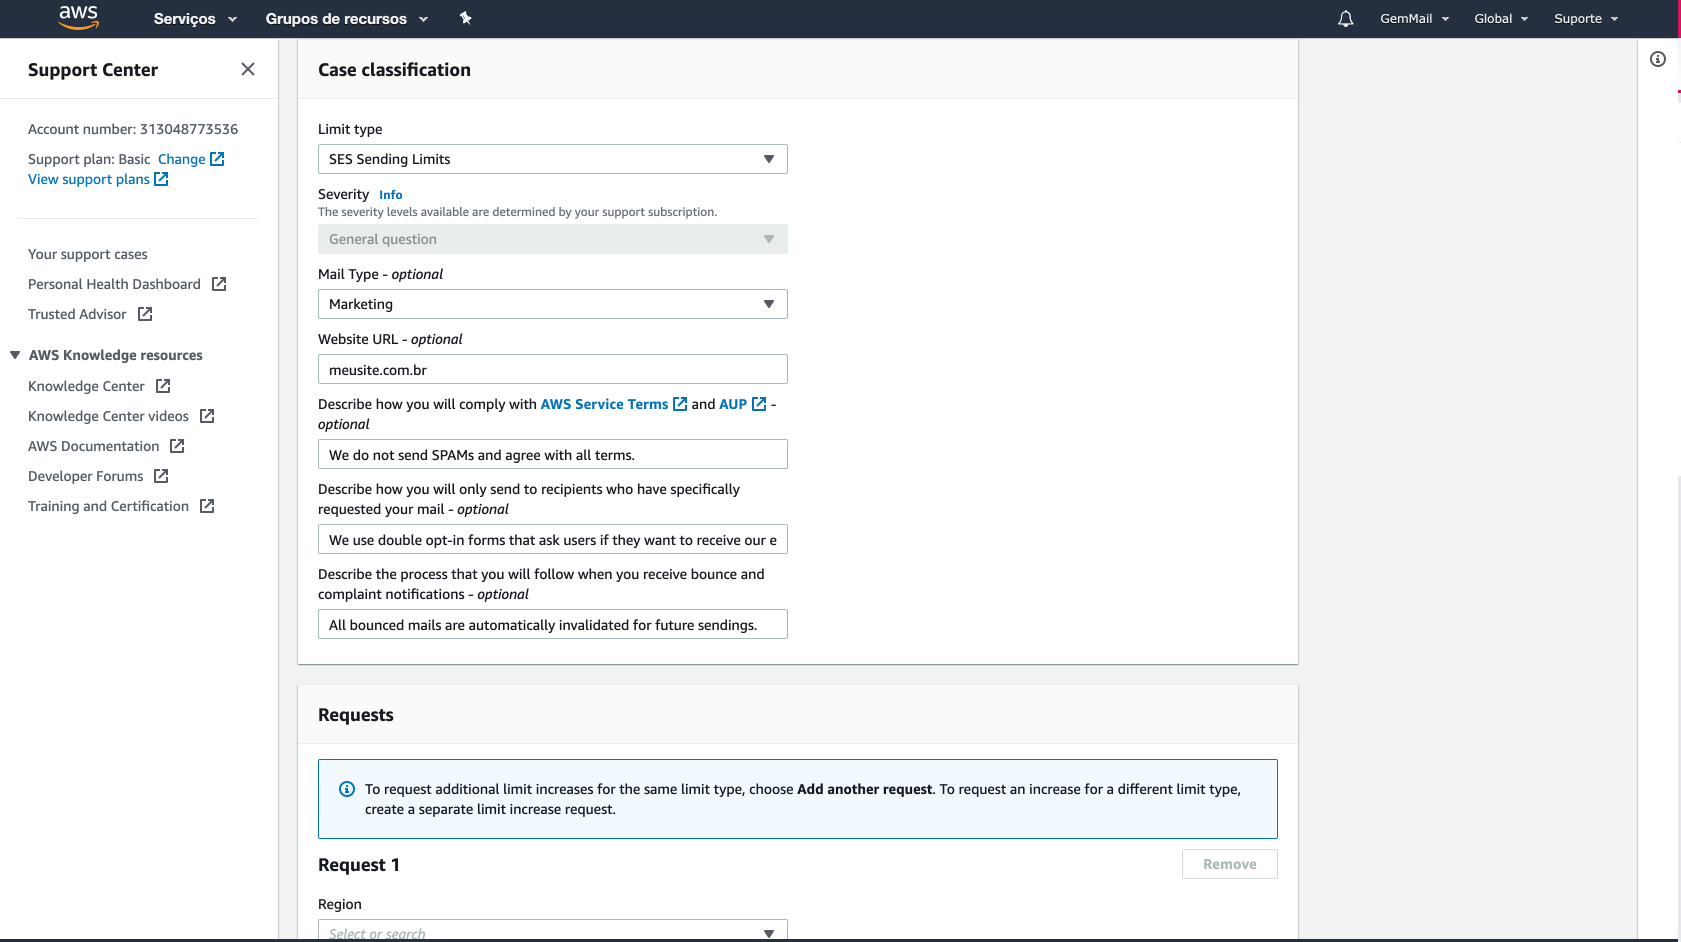
In the “Case classification” area, keep the “Limit Type” field with the “SES Sending Limits” option selected.
All other fields in the box are optional, however, we advise you to tell the truth and fill in the information that details your business.

In the “Describe how you will comply with AWS Service Terms and AUP – optional” field, which is also optional, you can say that you agree with Amazon’s terms and that you guarantee that you will be within the rules.
Remember the support is in English, see below for an example of how to fill in the fields.
Example of completing the Case classification table:
Limit type: – “SES Sending Limits”
Mail Type: – “Marketing”
Website URL: seudominio.com.br
Describe how you will comply with AWS Service Terms and AUP – optional: – “ We do not send SPAMs and agree with all AWS terms.”
Describe how you will only send to recipients who have specifically requested your mail – optional: – “ Our company uses double opt-in forms that ask users if they want to receive our emails.”
Describe the process that you will follow when you receive bounce and complaint notifications – optional:
– “All bounced mails are automatically blocked for future sendings.”
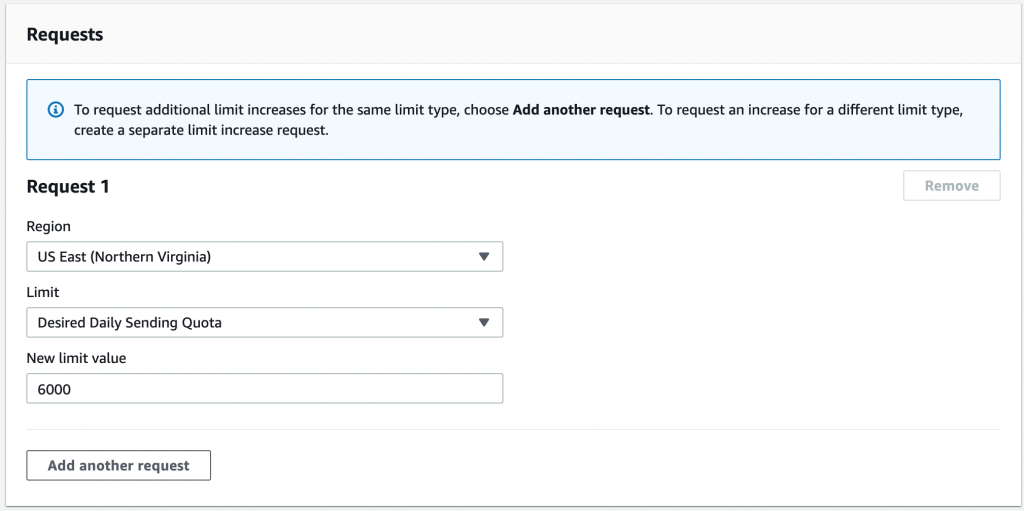
Fill in the “Requests” box to increase the limit for daily submissions.
Request 1:
Region: US East (Nothern Virginia) *
* or with the region you chose.
Limit: Desire Daily Sending Quota
New Limit value: 6000 **
** assuming you need up to 6000 shipments per day, however, use your own criteria
Now it’s time for the most important part of the form: Case Description.
Here you should write why you are asking for an increase in the sending limit.
Fill in the description and click on the orange button: “Submit”.
Now just wait for the approval which can take up to 24 hours.
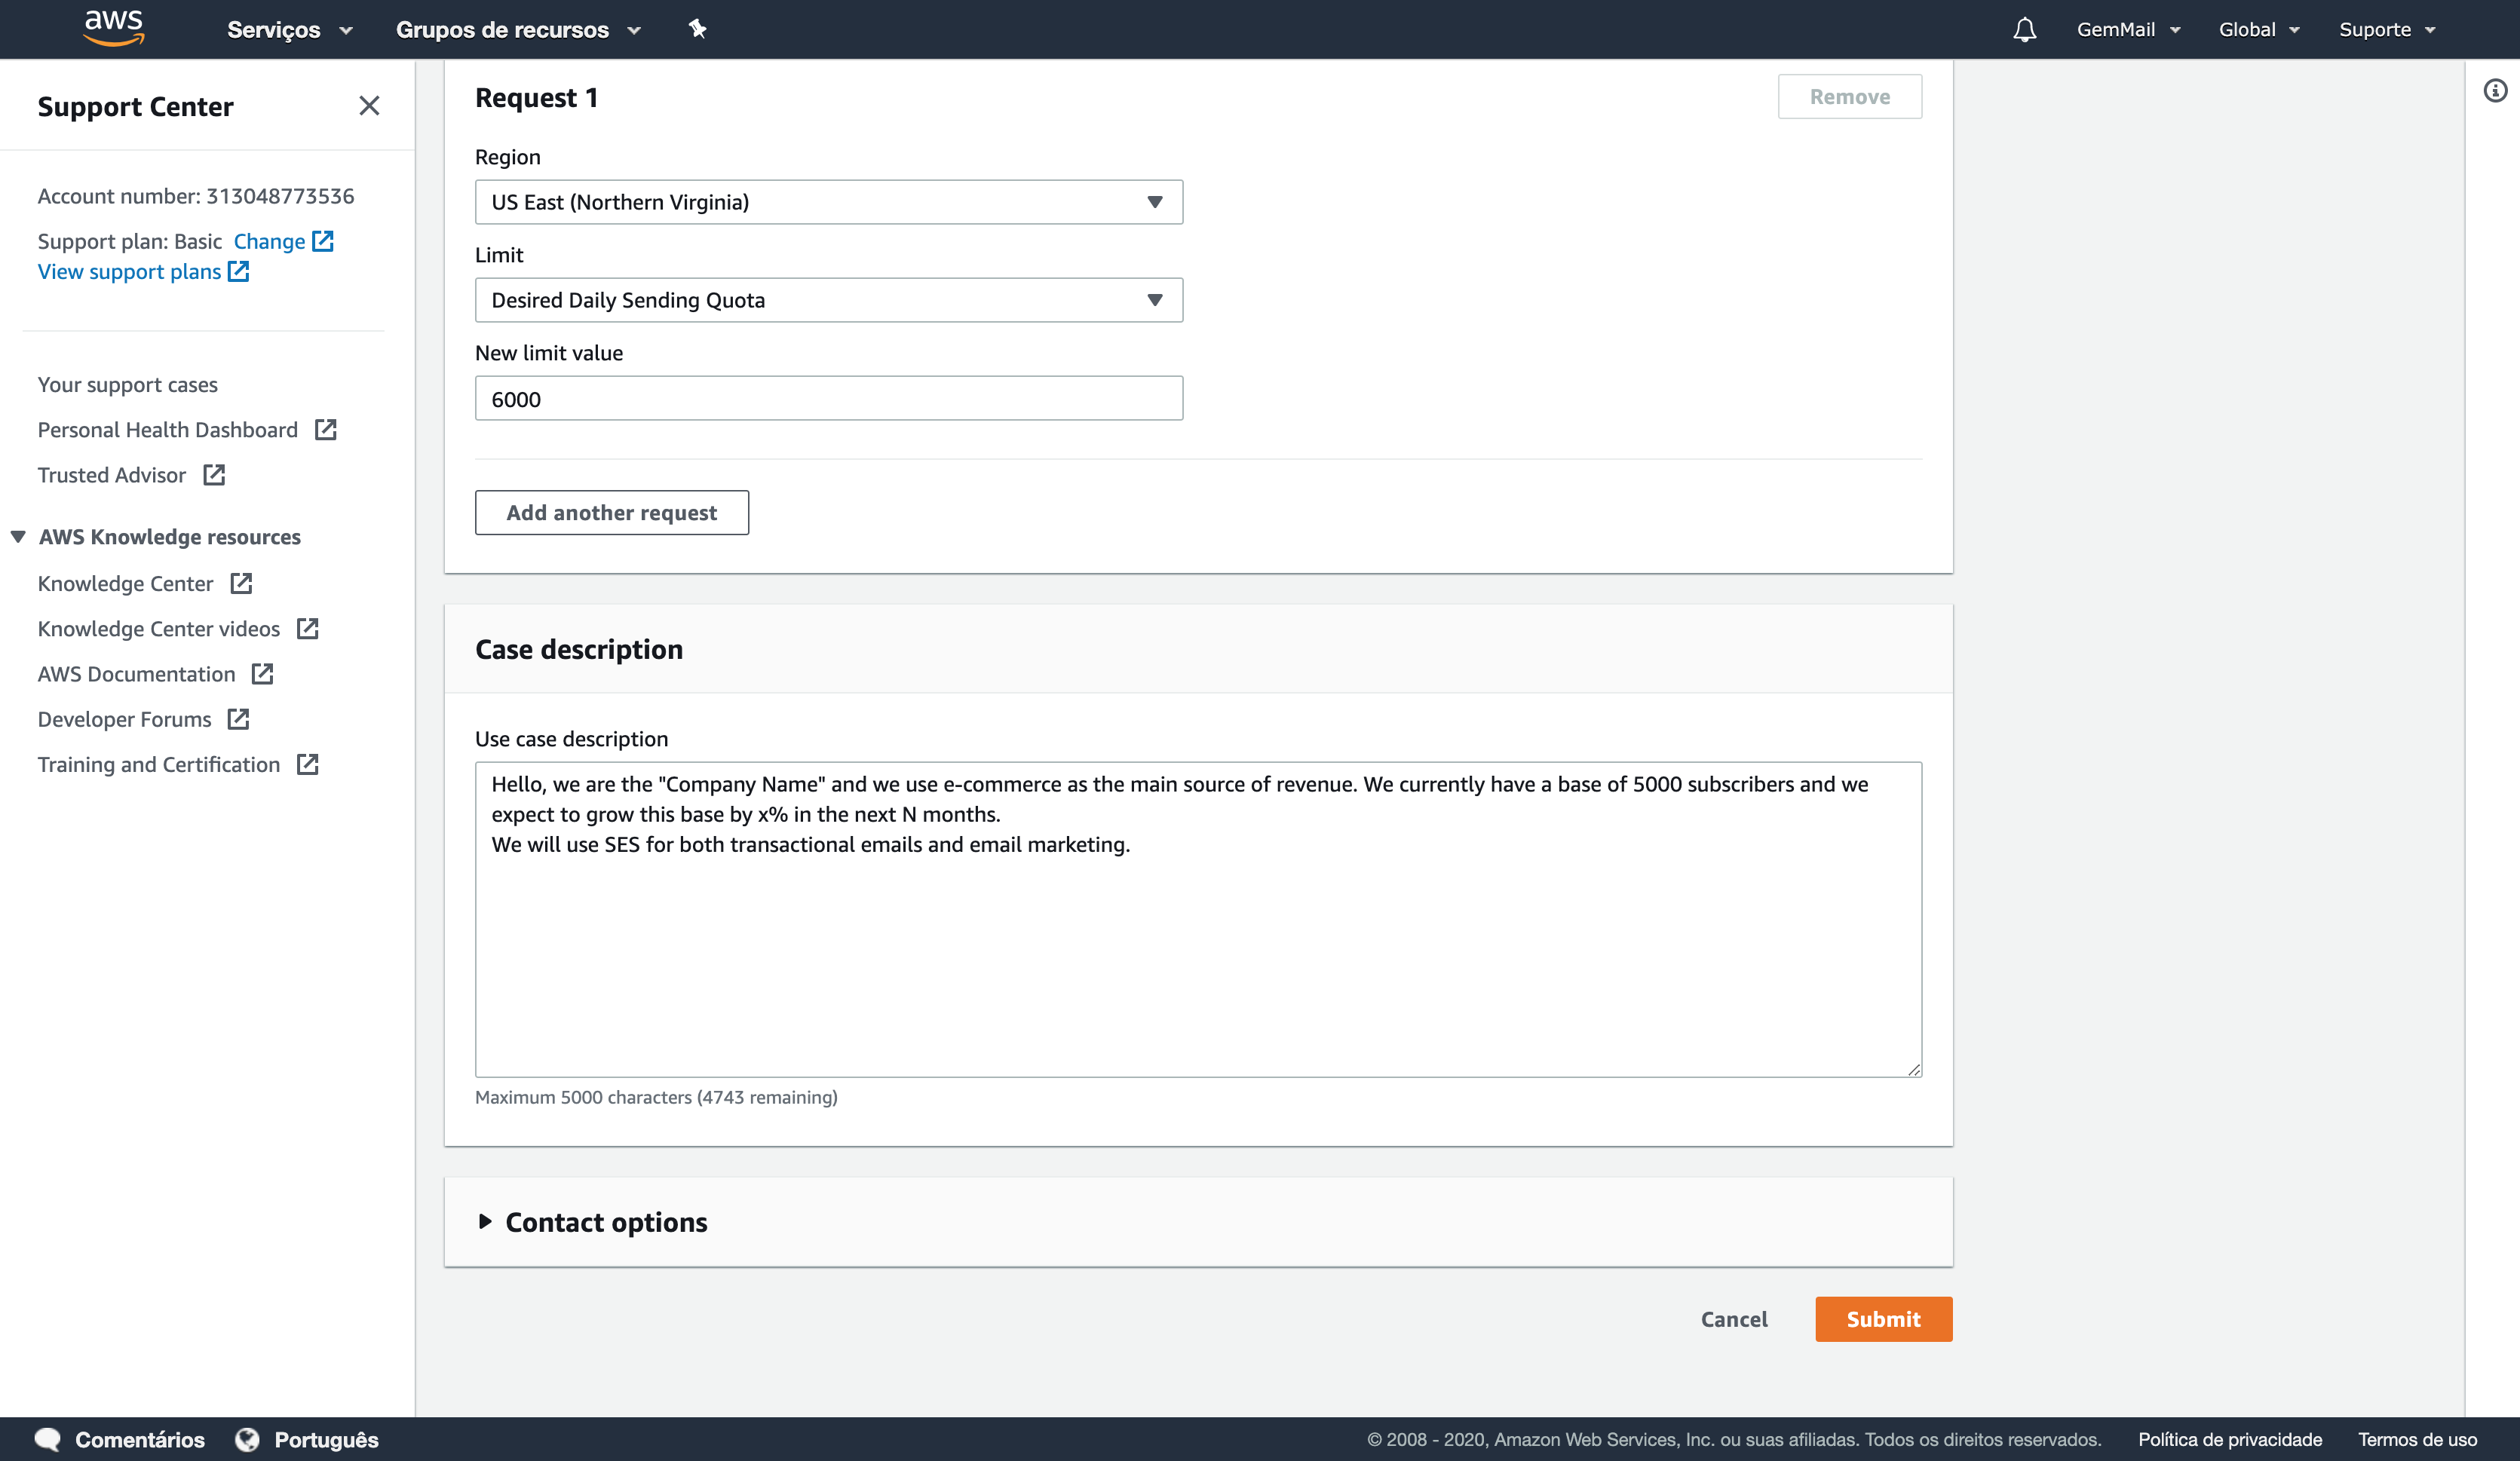
Example of filling the Case Description box:
Use case description: – “Hello, we are“ Company Name ”and we use e-commerce as the main source of revenue. We currently have a base of 5000 subscribers and we expect to grow this base by x% in the next N months.
We will use SES for both transactional emails and email marketing. ”
SETTING UP SMTP:
Choose Simple Email Service: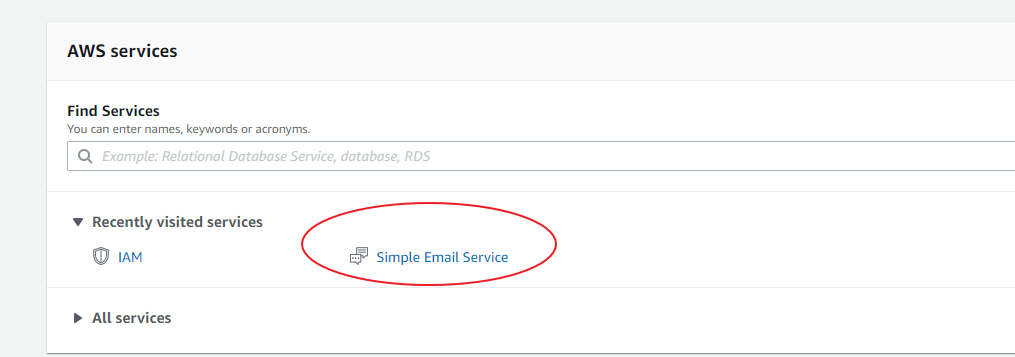
go to SMTP settings: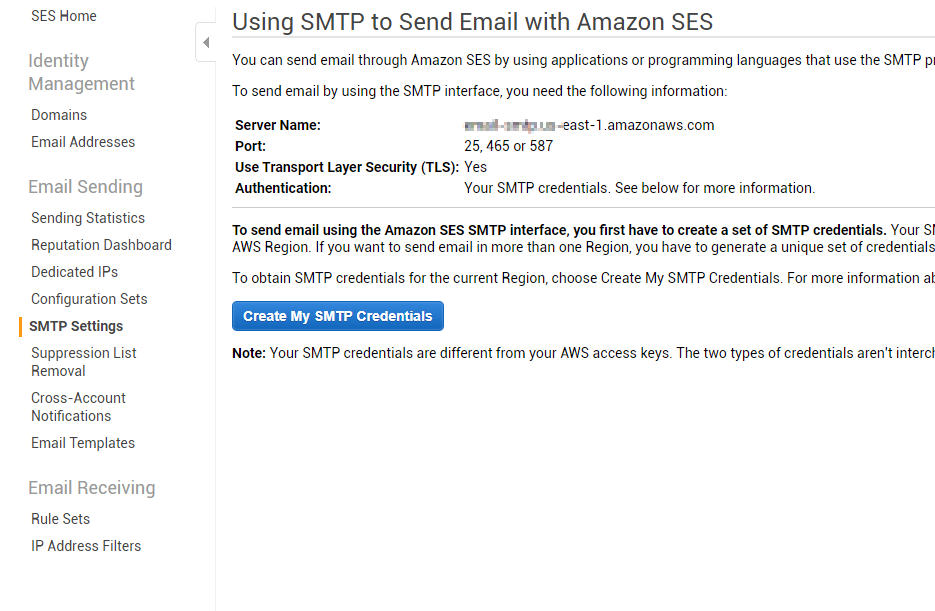
then choose Create My SMTP Credentials option: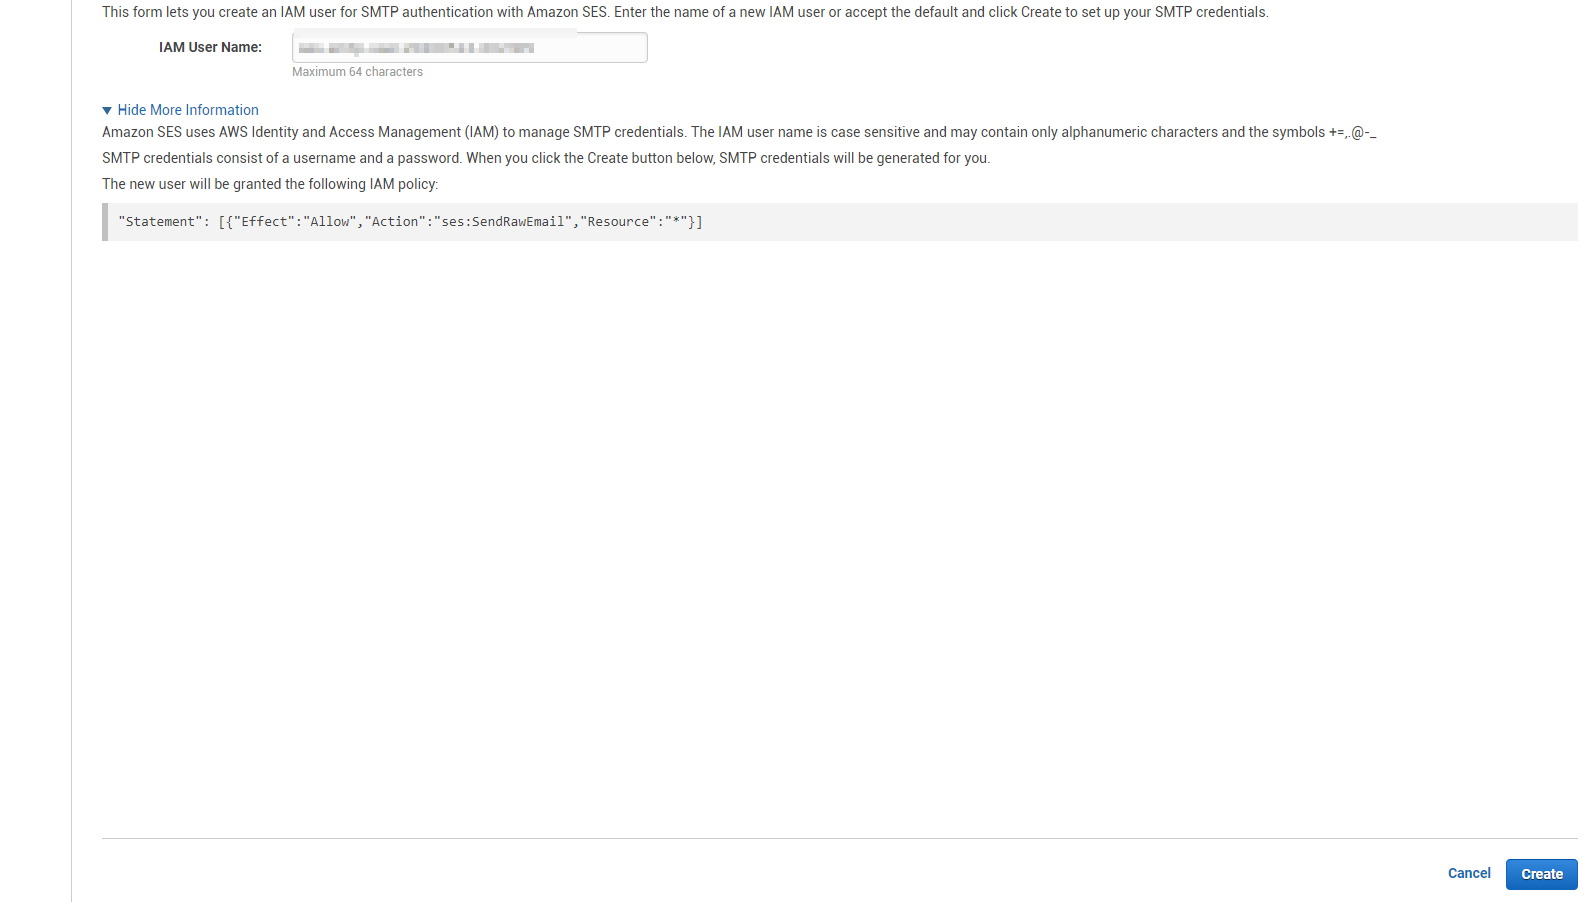
then after creating, you will have the SMTP credentials created: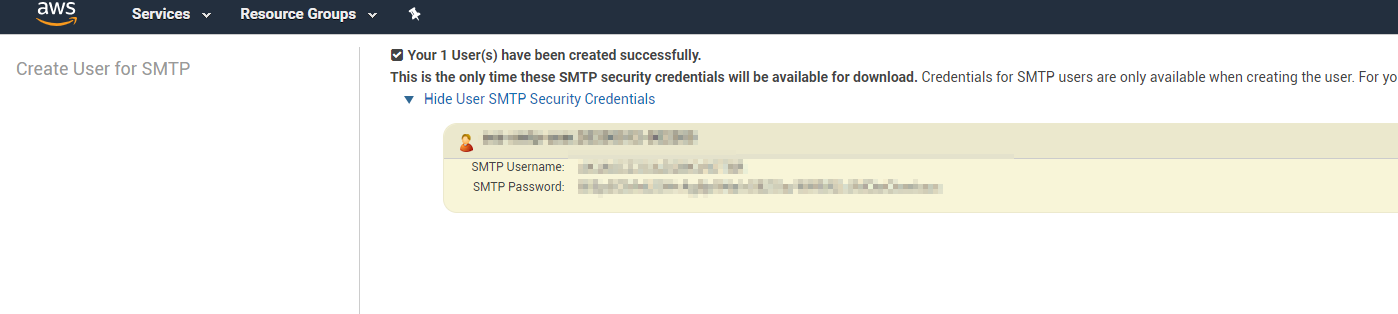
then you will be able to use those credentials with any software that manage SMTP settings:
Server Name:
email-smtp.us-east-1.amazonaws.com
Port:	25, 465 or 587
Use Transport Layer Security (TLS):	Yes
Authentication:	Your SMTP credentials. See below for more information.
REMOVING EMAIL FROM SUPPRESION LIST
After setting up AWS SES, it happened that one of mails was on the Suppresion List. I tried to remove it using the Amazon SES Global Suppression List but it didn’t work. so I had to do it using the console.
so I needed to create a new IAM user for this: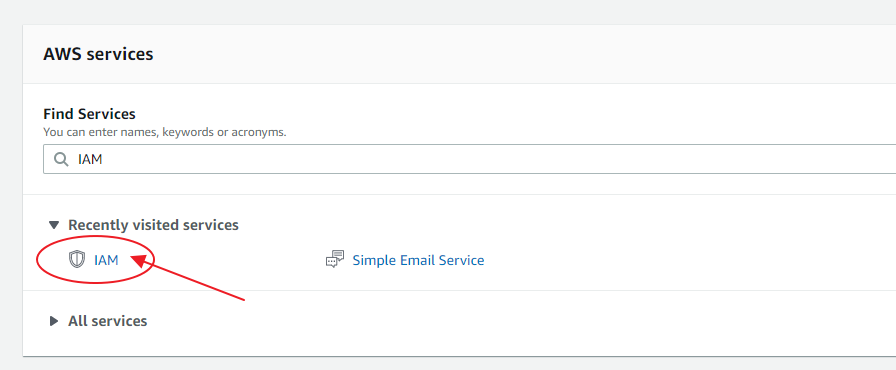
then create a new user: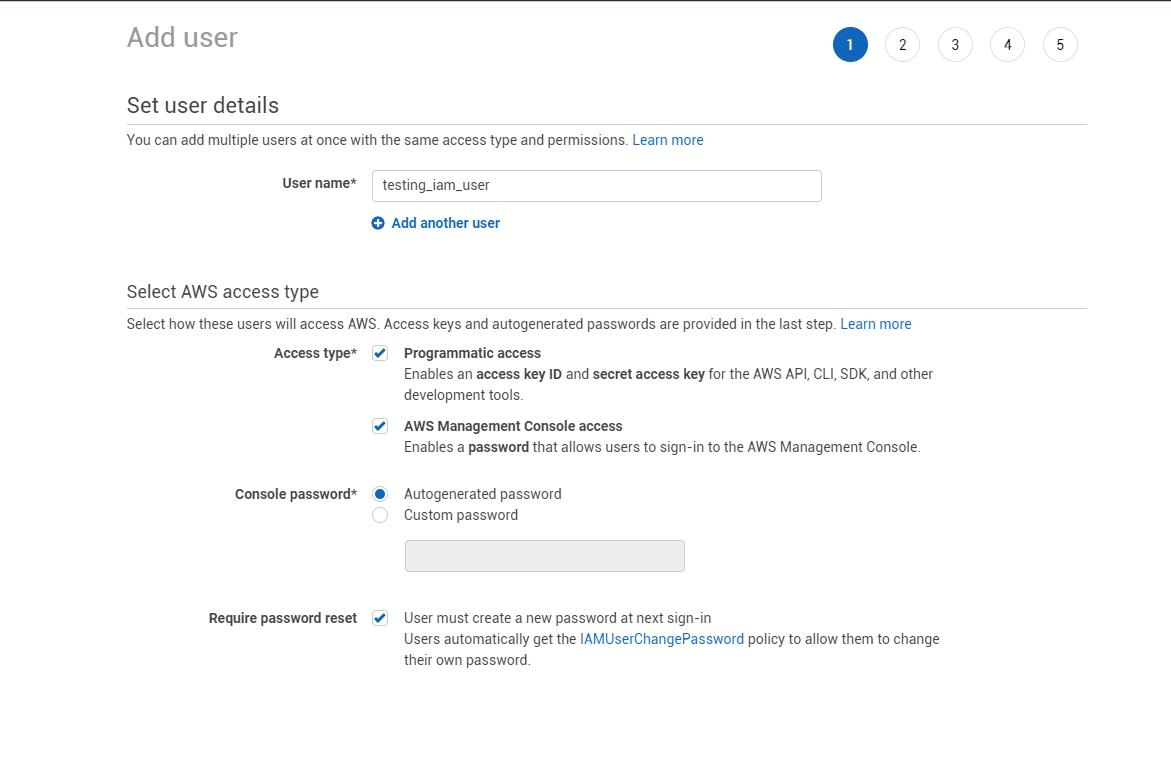
then choose Attach existing policies directly: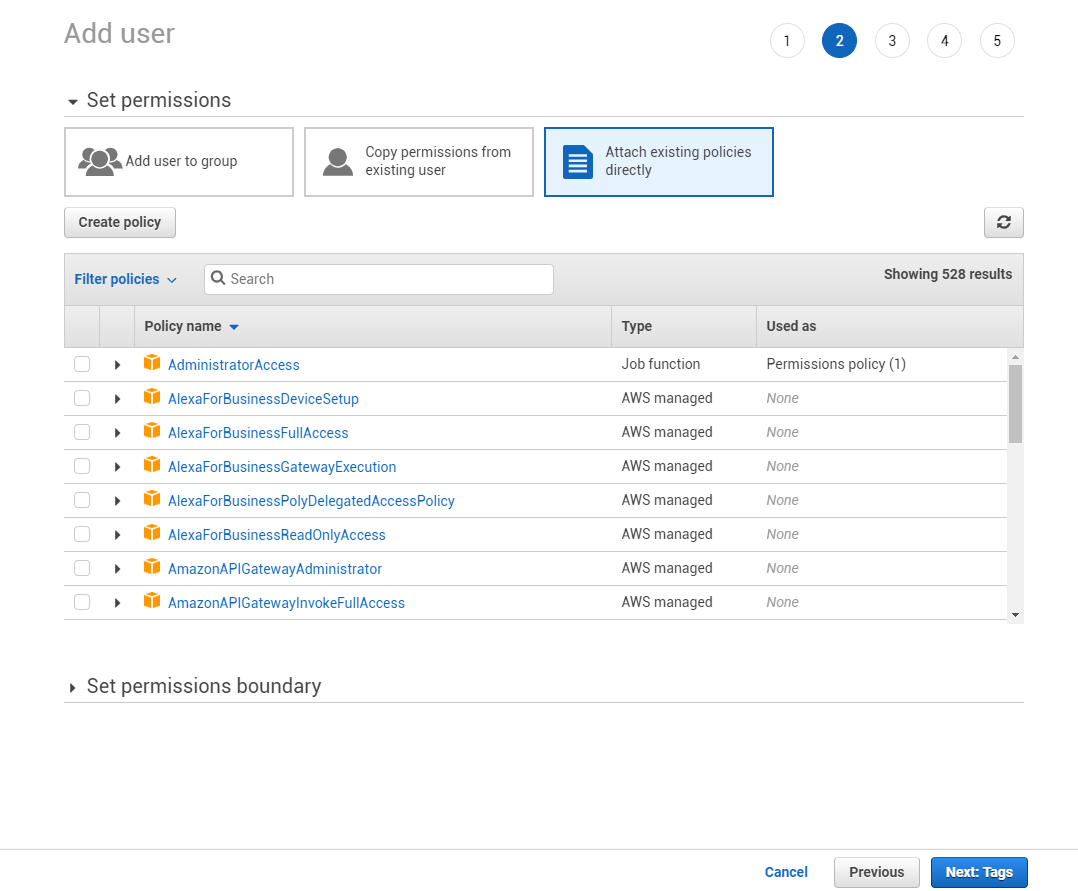
and add the next policies (search and check the options):
AmazonSESFullAccess
AmazonSNSFullAccess
then next up to step 4: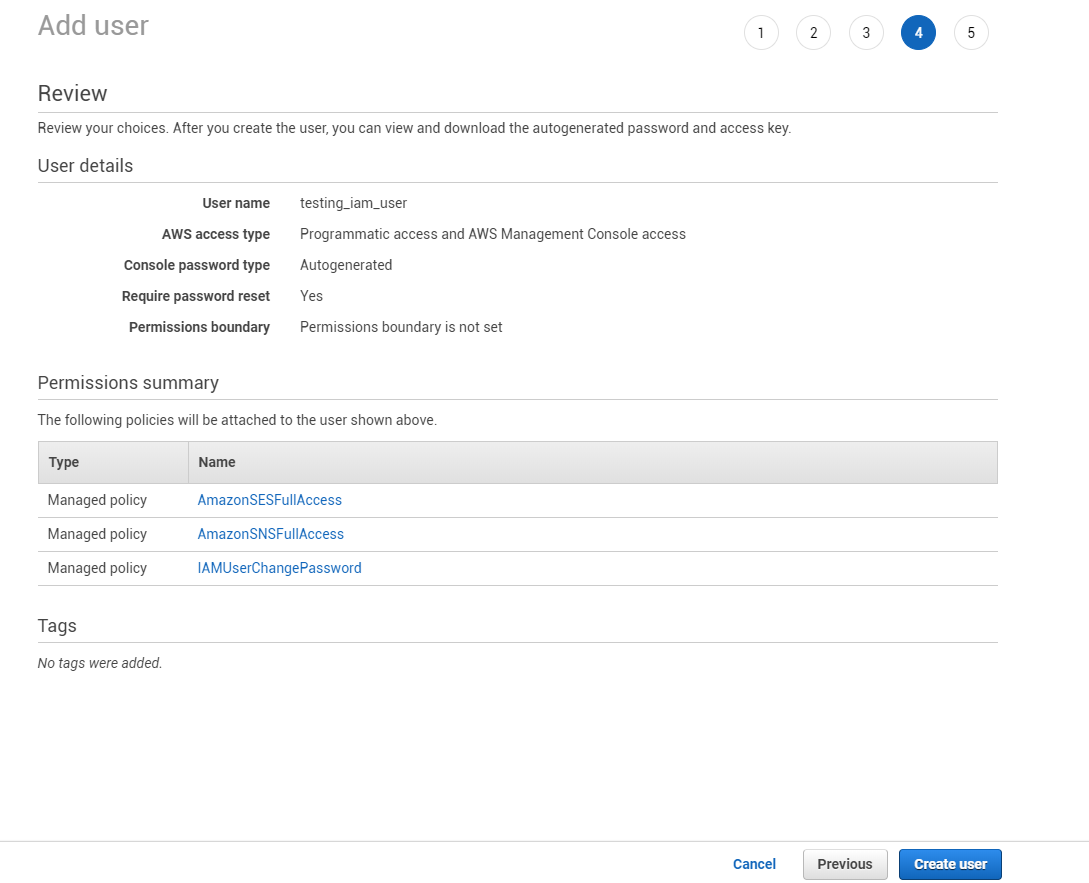
then press Create User: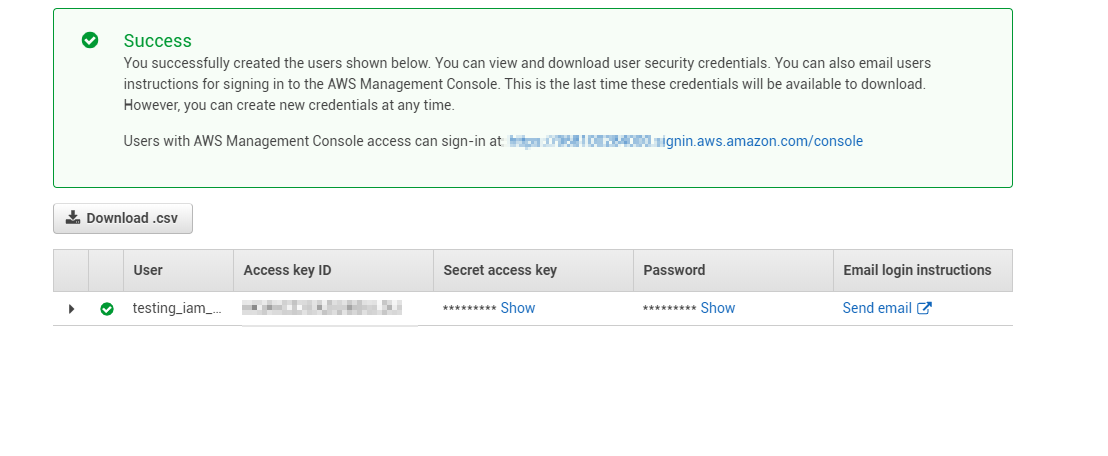
then Open up powershell console on Windows OS, and add the next:
aws configure
then add the AWS Access key and Secret Access Key from the new user that we have created: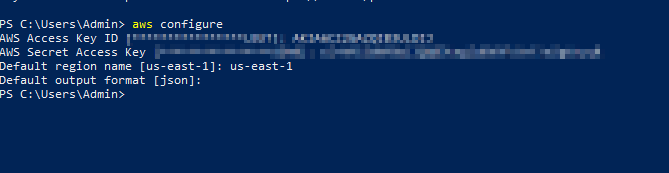
then list all suppressed emails:
aws sesv2 list-suppressed-destinations
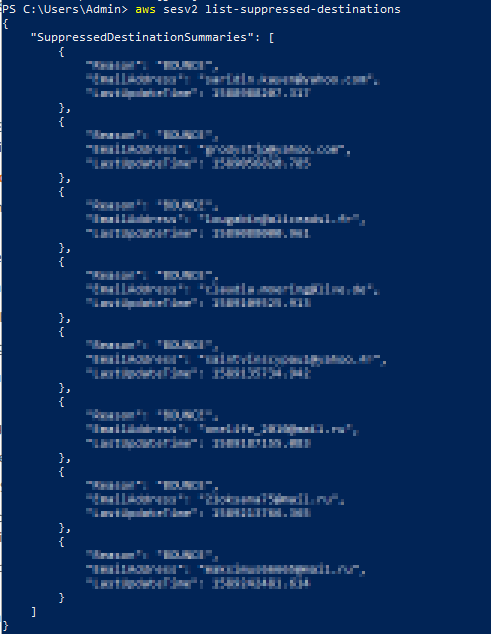
For removing the mail from the Suppression List, just add the next:
aws sesv2 delete-suppressed-destination `
--email-address [email protected]
and done! your email will be removed from suppresion list and your mail will receive the mails.
More commands for the Suppression List on here.
CONCLUSION
After setting up AWS SES, you will be able to send email using Amazon SES SMTP interface.