Once you have a wordpress site installed, most of the times the mail notification do not arrive to mail recipients. it is because the default php mailer is used and the mails comes from the servers which are considered not trusted so the mails are considered spam on the most of popular email services like gmail, outlook, and yahoo.
so the only way to make those mail notifications arrive to inbox in a trusted way is using an SMTP settings from a SMTP provider.
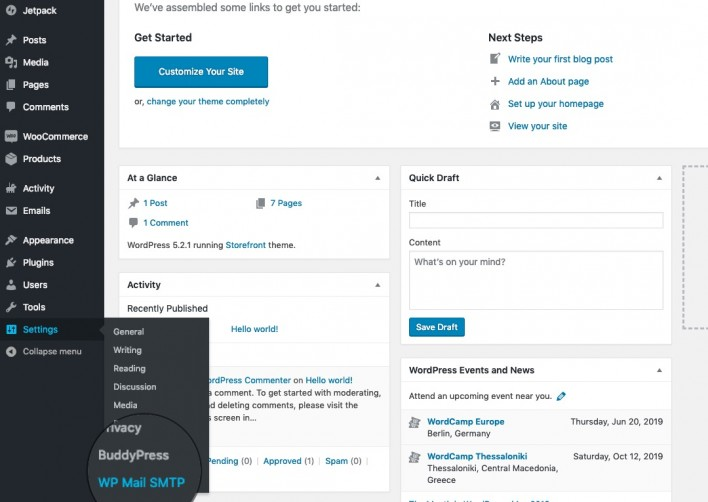
first you need to install a plugin that manage the smtp settings.
To begin, install a plugin named WP Mail SMTP . Once the plugin is installed and activated, a new menu will show up under the Settings section called Email. You will need to navigate to it to configure WordPress to work with SMTP.
On this page you will see several configuration options available: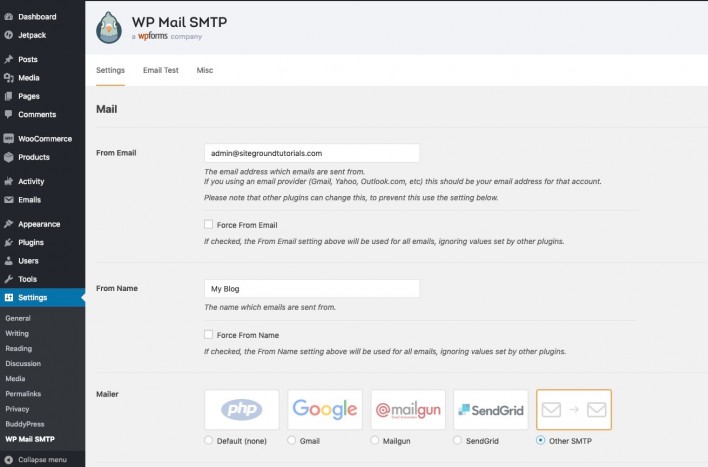 Here’s a list of all of them and what do they configure:
From Email – the email address you want to send emails from – for example, [email protected];
From Name – the name that your emails will be sent from;
Mailer – choose whether you want to use the Default PHP mail() function, a Gmail/G Suite account, Mailgun, SendGrid or other SMTP servers. Choosing the Default mode would send the messages using the PHP mail() function without SMTP authentication. The Gmail/G Suite, Mailgun and SendGrid options require additional info such as Client ID and Client Secret or API key that should be obtained by the respective provider. The other SMTP server option would prompt you to enter additional configuration details which we would describe below.
Return Path – check if you want to match the return path for your emails to the sending email;If you choose other SMTP servers as a mailer, you would be prompted to add the SMTP server’s configuration settings.
SMTP Host – the hostname for your SMTP server;
SMTP Port – the port your server works on;
Encryption – if you have SSL/TLS encryption available for that hostname, select it here;
Auto TLS – if your server supports TLS encryption, enable this option;
Authentication – check if your SMTP server requires authentication;
Username – the username for your SMTP server;
Password – the password for your SMTP server;Once you configure those parameters, click Save Settings at the bottom of the page.
Choosing a SMTP provider
After trying the most popular SMTP providers, I will enumerate all of them:
1. Amazon SES – I think it is the best SMTP service by far but it requires time and many steps to fulfill the requirements.
2. Google SMTP – it is easy to set up, you only need a gmail email account then you can set up your SMTP settings. it will allow 500 email per day. if you need upgrade the limits, you will need to upgrade on Google Suite.
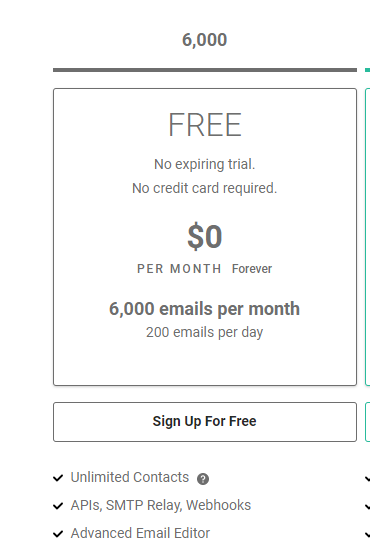
3. Mailjet – it offers 200 free mails per day and it is affordable for small business.
4. Mailgun – it offers 5000 free emails per month for 3 months, then you will have to pay as you grow which is $0.80 per 1000 emails.
5. SendGrid – it offers 100 free emails per day.
6. SMTP2go – it offers 1000 free email per month. it is only useful when you just want to test the service. when you verify the domains, you will upgrade to 200 free mails per day but once the limit is reached, the next plan costs $75 USD per month which is expensive.
7. Sendinblue – it offers 300 free emails per day but once the limit is reached, the next plan costs $25 USD per month which is kind of expensive.
Setting up Amazon SES
As I mentioned, Amazon SES is the cheapest and trusted SMTP provider on the market. but it needs time and many steps to set it up. I prepared a step-by-step tutorial where you can set Amazon SES up successfully: Click here for more info.
Setting up Google SMTP
This method allows you to manually connect to Gmail’s SMTP servers to send your WordPress emails.
First, you need to visit Settings » WP Mail SMTP page to configure the plugin settings.
You need to start by providing the Gmail address you want to use in the ‘From Email’ field, and your name in the From ‘Name’ field.
Next, you need to select ‘Other SMTP’ as your mailer and check the box next to return path.
After that, scroll down to the Other SMTP section to configure more
settings.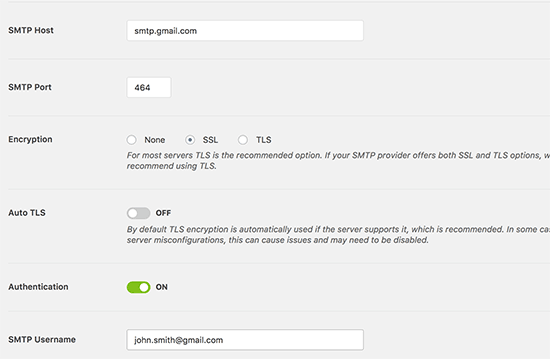
Here is the exact configuration you need to add in the plugin settings: SMTP Host: smtp.gmail.com SMTP Port: 465 Encryption: Use SSL encryption Authentication: Turn on authentication Username: Your complete Gmail address, e.g. [email protected] or [email protected] Password: Password of your Gmail account
Once you are done, click on the save changes button to store your settings.
That’s all, you have successfully set up WP Mail SMTP to use Gmail SMTP servers.
Note: If you use method two, please know that it’s less secure because your password is stored in text. You can enhance this by using the constants tip, but we strongly recommend using Method 1.
Send email from Gmail with SMTP authentication but got “5.5.1 Authentication Required” error
You may get error message mentioned below when you using your gmail account to
send email message through your scriptThe SMTP server requires a secure connection or the client was not
authenticated. The server response was: 5.5.1 Authentication Required.Solution:1. Please make sure you have set SMTP
authentication correctly in your script.2. If there is no problem with your
SMTP script, but you still got the message message mentioned above, then the
error might occur due to the following cases:
case 1: when the password is wrong
case 2: when you try to login from some App
case 3: when you try to login from the domain other than your time zone/domain/computer (This is the case in most of scenarios when sending mail from code)
There is a solution for each
solution for case 1: Enter the correct password.
solution for case 2: go to security settings at the following linkhttps://www.google.com/settings/security/lesssecureapps and enable less secure apps . So that you will be able to login from all apps.
solution 1 for case 3: (This might be helpful) you need to review the activity. but reviewing the activity will not be helpful due to latest security standards the link will not be useful. So try the below case.
solution 2 for case 3: If you have hosted your code somewhere on production server and if you have access to the production server, than take remote desktop connection to the production server and try to login once from the browser of the production server. This will add exception for login to google and you will be allowed to login from code.
But what if you don’t have access to the production server. try the solution 3
solution 3 for case 3: You have to enable login from other timezone / ip for your google account.
to do this follow the link https://g.co/allowaccess and allow access by clicking the continue button.
And that’s it. Here you go. Now you will be able to login from any of the computer and by any means of app to your google account.
Testing Your WP Mail SMTP Settings
WP Mail SMTP plugin allows you to test your email settings, so you can make sure that everything is working properly.
You need to visit Settings » WP Mail SMTP page and click on the ‘Email Test’ tab. Simply provide an
email address that you can access in the send to field and click on the send
email button.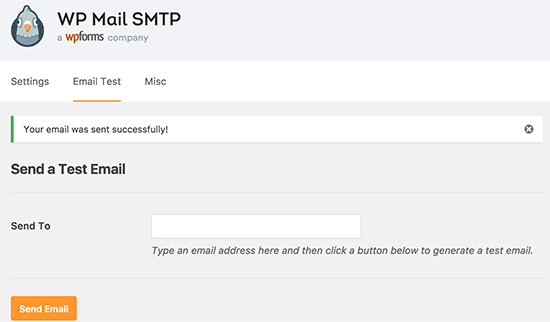
You will see a success message. You can now check your inbox to see a message with the subject line ‘WP Mail SMTP: Test Email to…’.
That’s all, you have successfully setup your WordPress site to send emails using Gmail SMTP servers.
Setting up MailJet
I have chosen this SMTP service. so I will proceed to configure.
Go to mailjet site: https://www.mailjet.com/pricing/
then choose free option. Press Sign Up For free button.
Fill the information: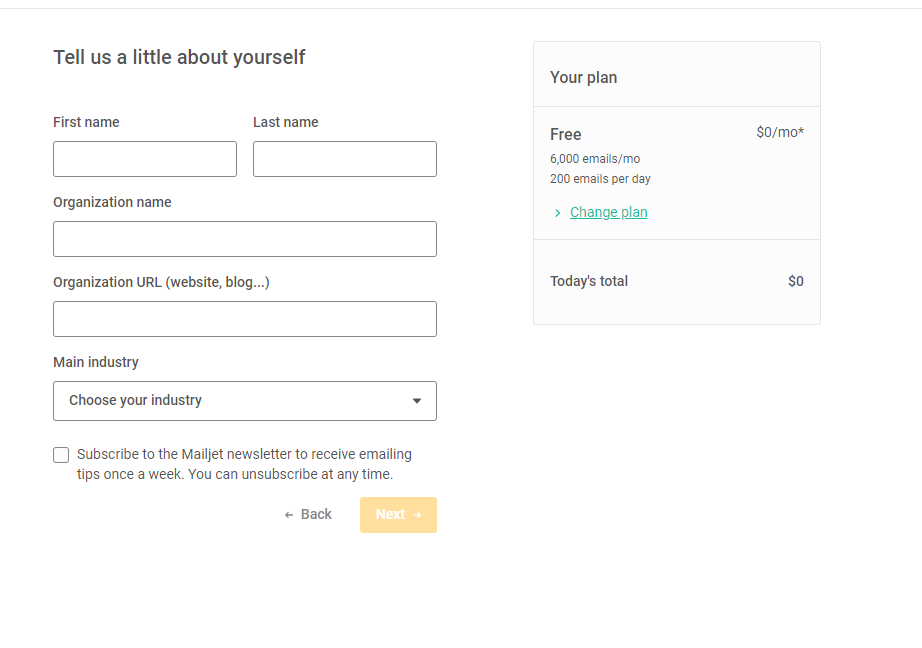
then you will receive a confirmation: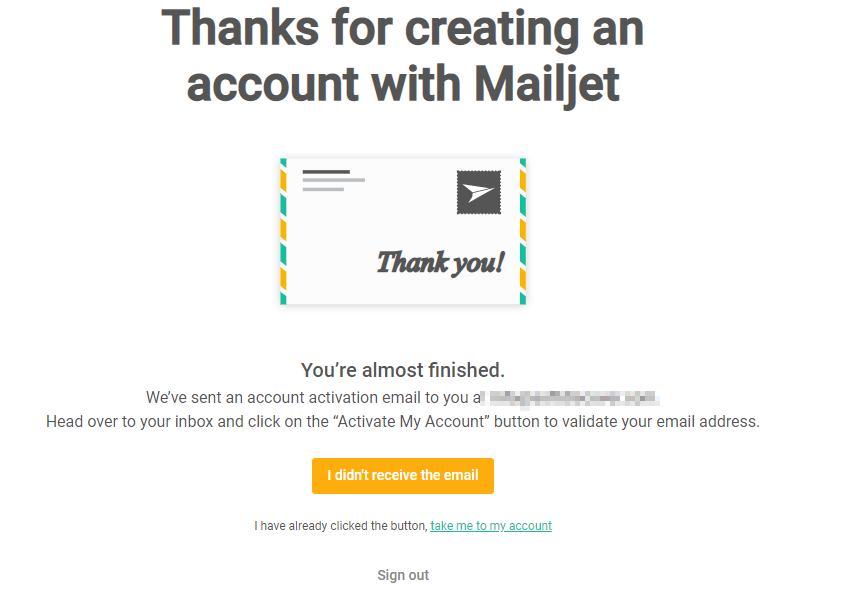
once your check your mail, you can click on the button or on the
link: 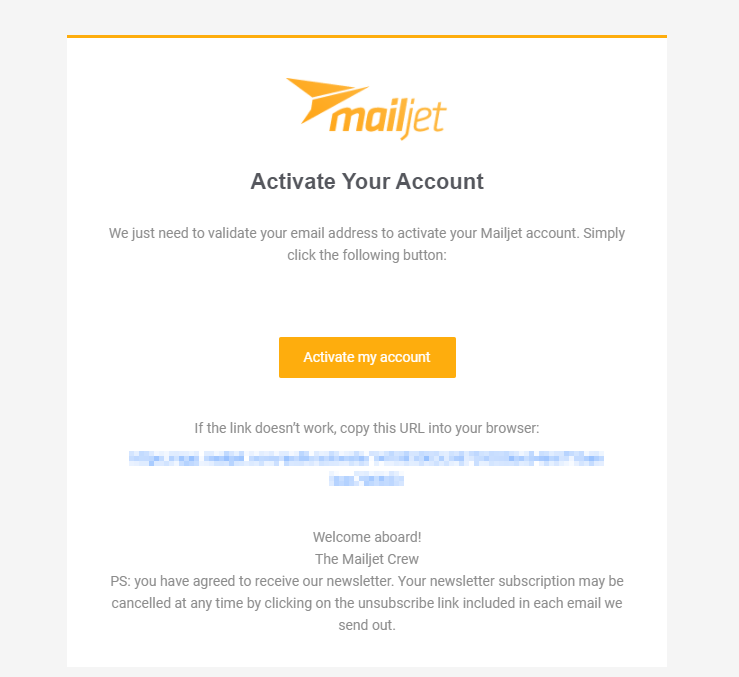
then you account will be ready to be used. after pressing the confirmation
link, two options will appear: 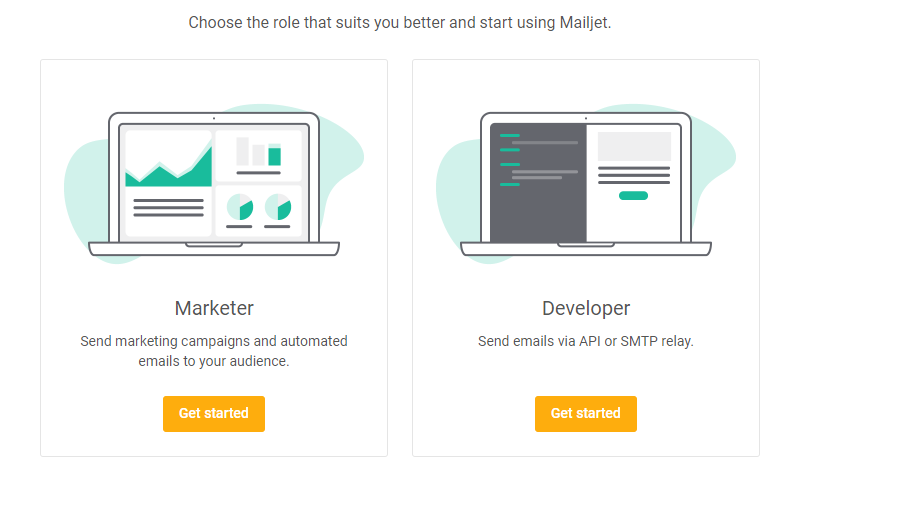
you will choose developer in order to set up the smtp, then choose SMTP
relay: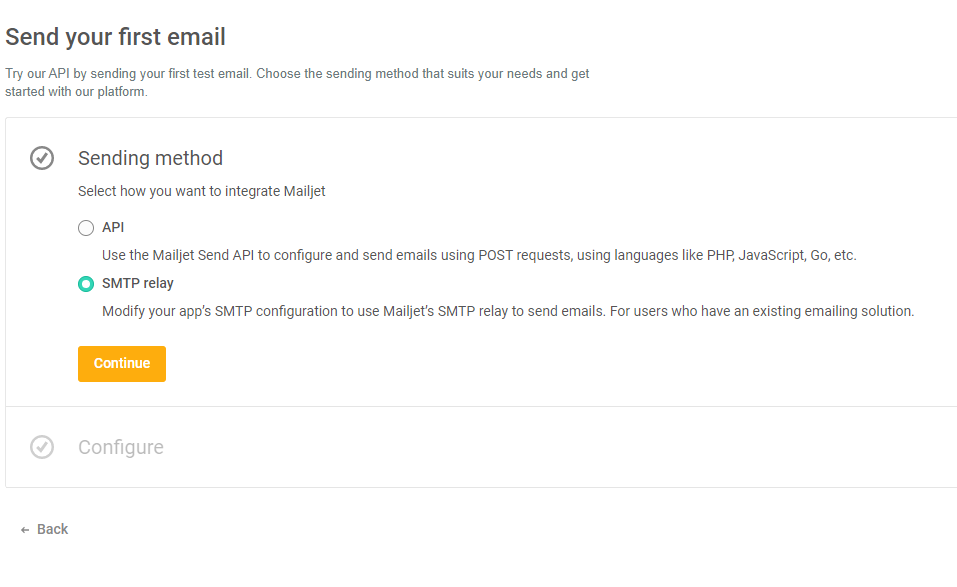
then it will show the SMTP credentials: 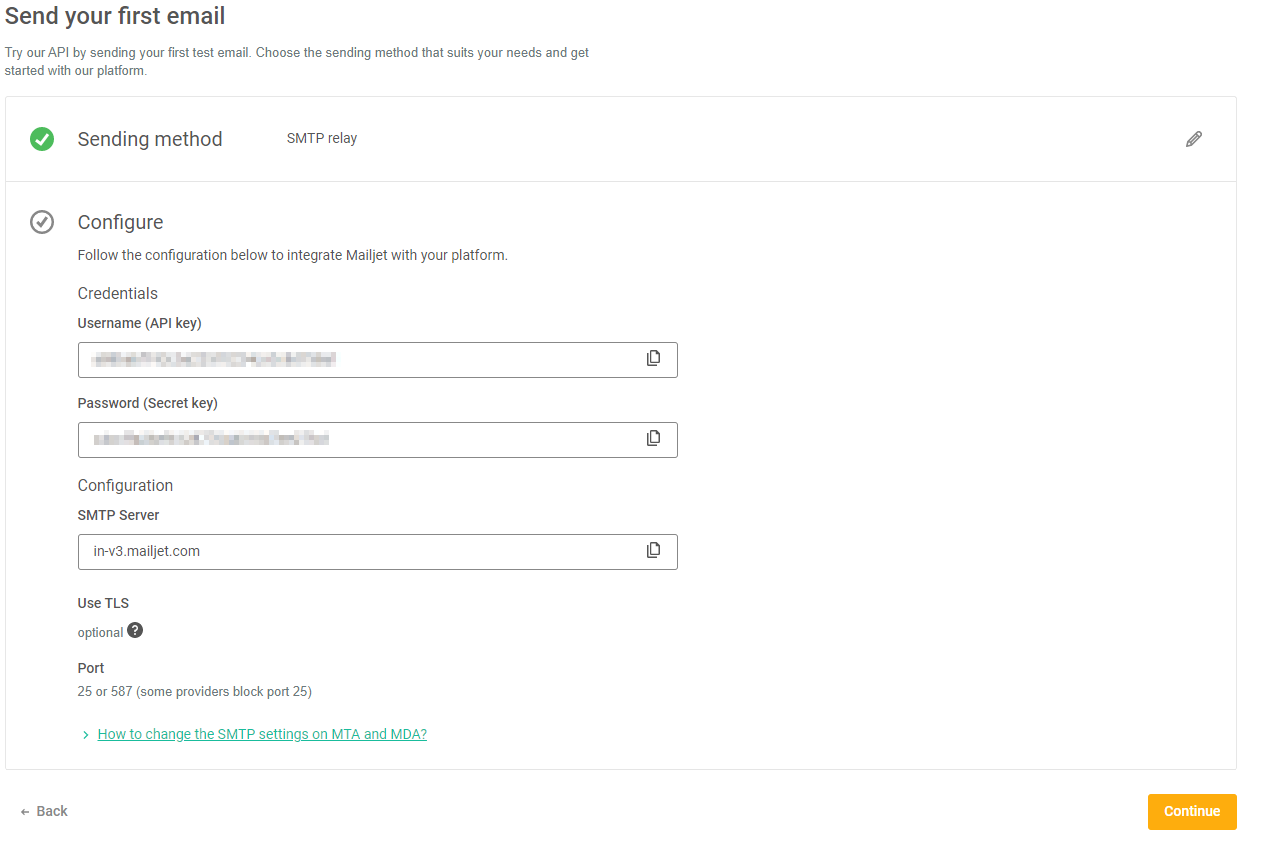
Copy that info and save it somewhere else.
then press Continue button and that’s all. it will show other options which are not required.
then On header menu, click on the Name of your account: 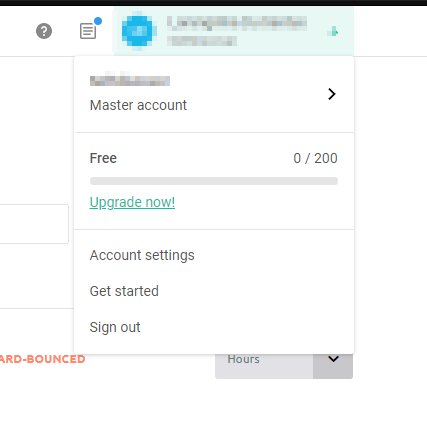 then press on Account settings and choose Add a Sender Domain option:
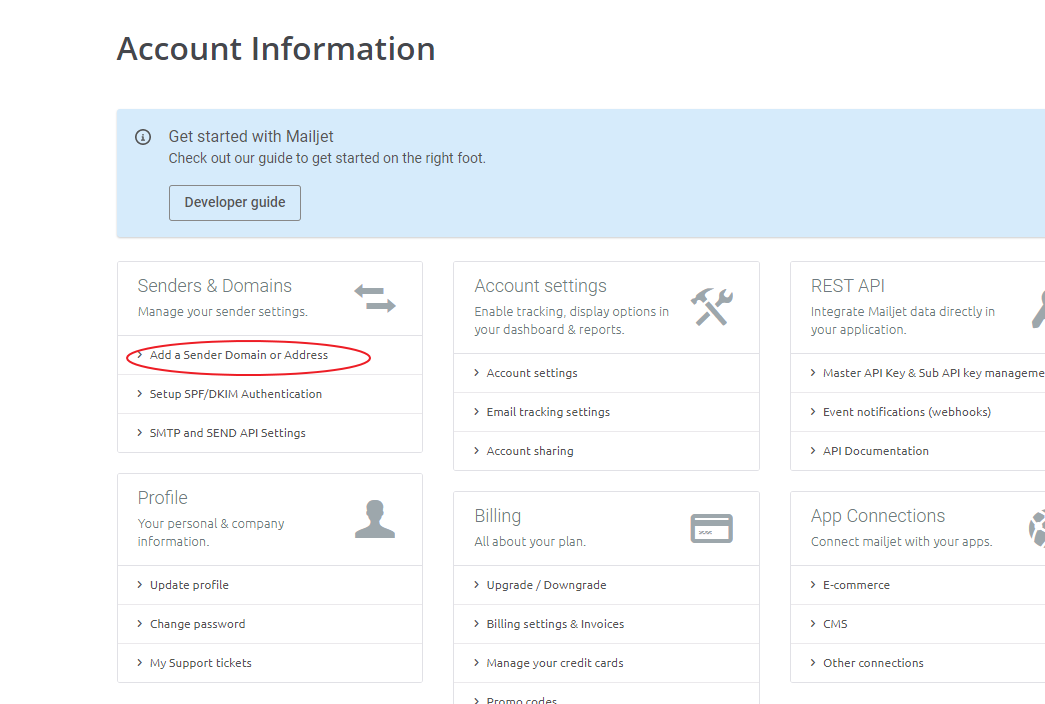 and you can verify custom address or domains:
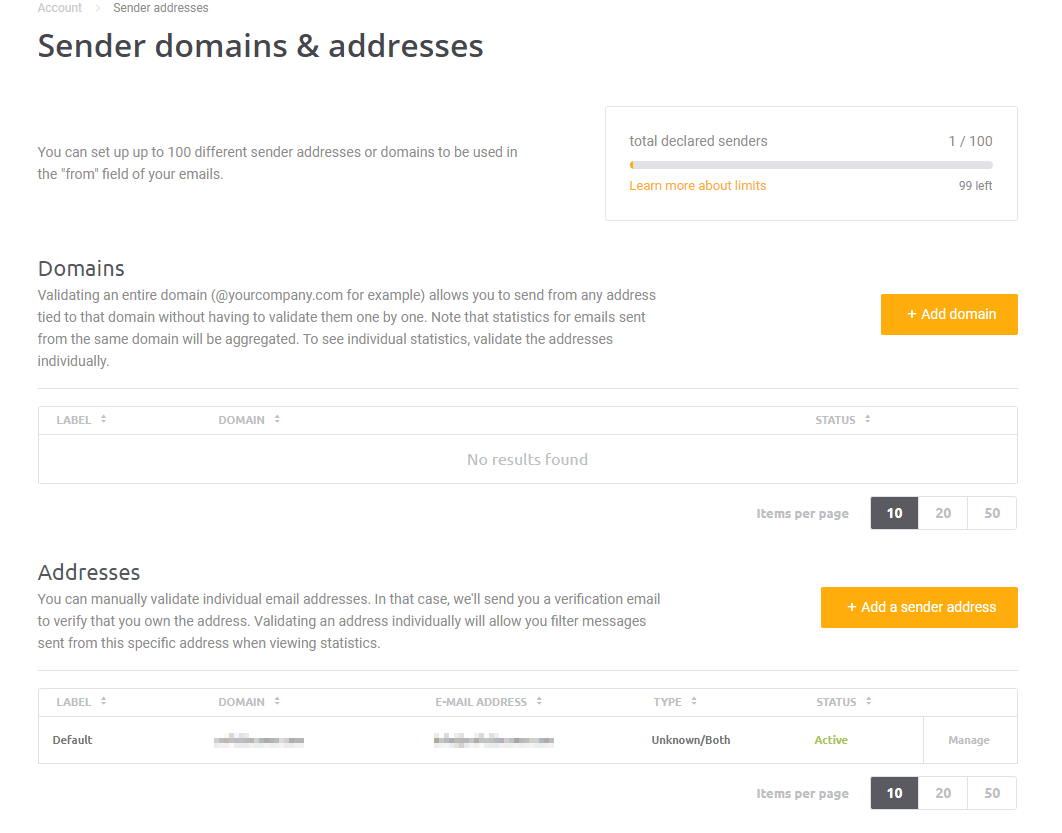 for our case, I can use the default email address as a sender but I will add
a new one. so I will press on Add a Sender Address button, then it will ask
you to put an email address. then once is added, it will have an status to
pending for confirmation.
for our case, I can use the default email address as a sender but I will add
a new one. so I will press on Add a Sender Address button, then it will ask
you to put an email address. then once is added, it will have an status to
pending for confirmation. 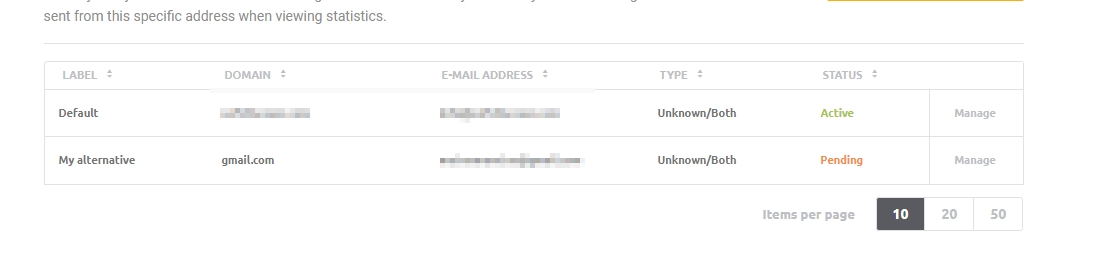 then the new sender address will receive a confirmation:
 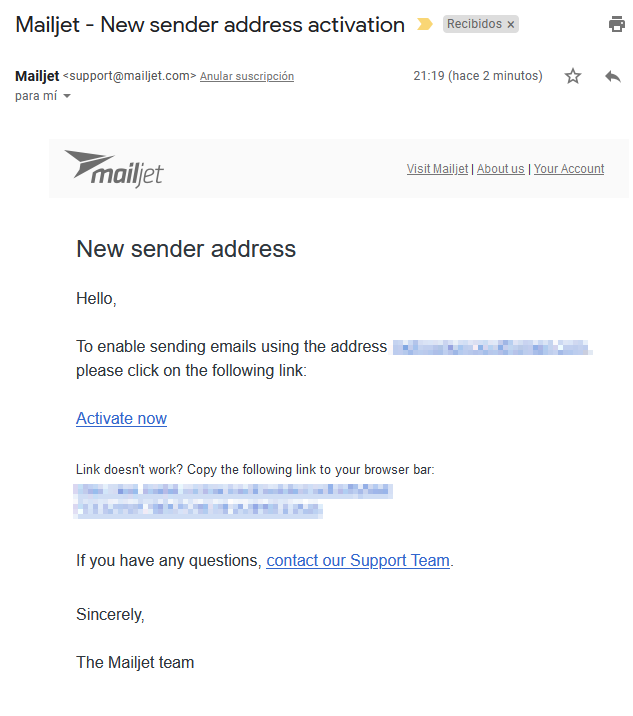 once the confirmation link is chosen, it will ask you to log in. then after
loggin in. you will see the success activation message.
once the confirmation link is chosen, it will ask you to log in. then after
loggin in. you will see the success activation message. 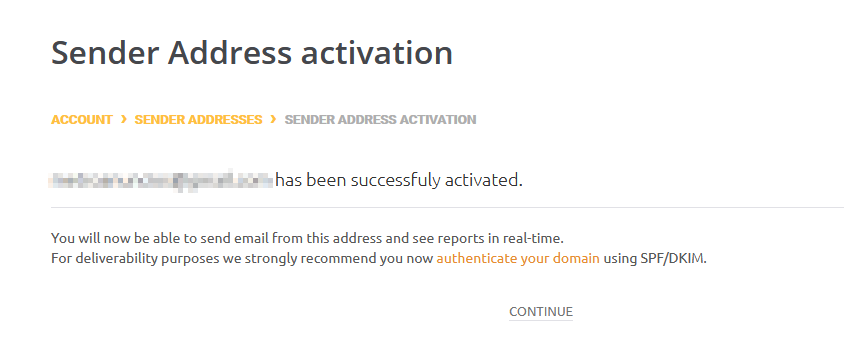
 now you can use the new sender address on the mail settings of your
site. also in order to avoid confirming senders mails one by one, you can
just add a domain, then you won’t need to validate sender
addresses.
now you can use the new sender address on the mail settings of your
site. also in order to avoid confirming senders mails one by one, you can
just add a domain, then you won’t need to validate sender
addresses. 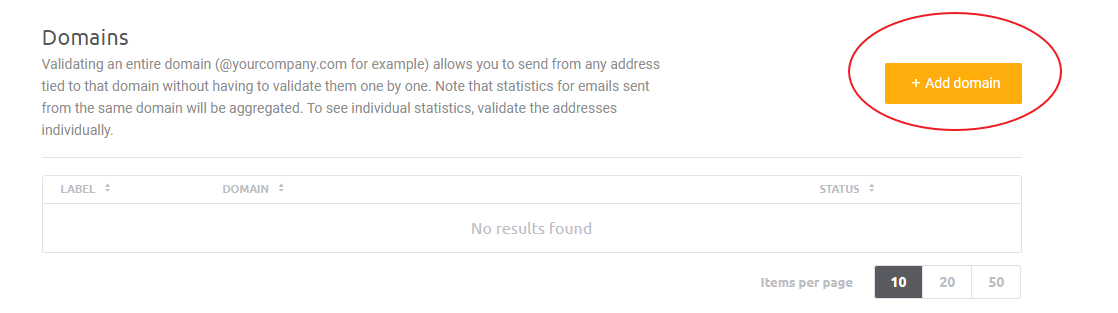 fill the information:
 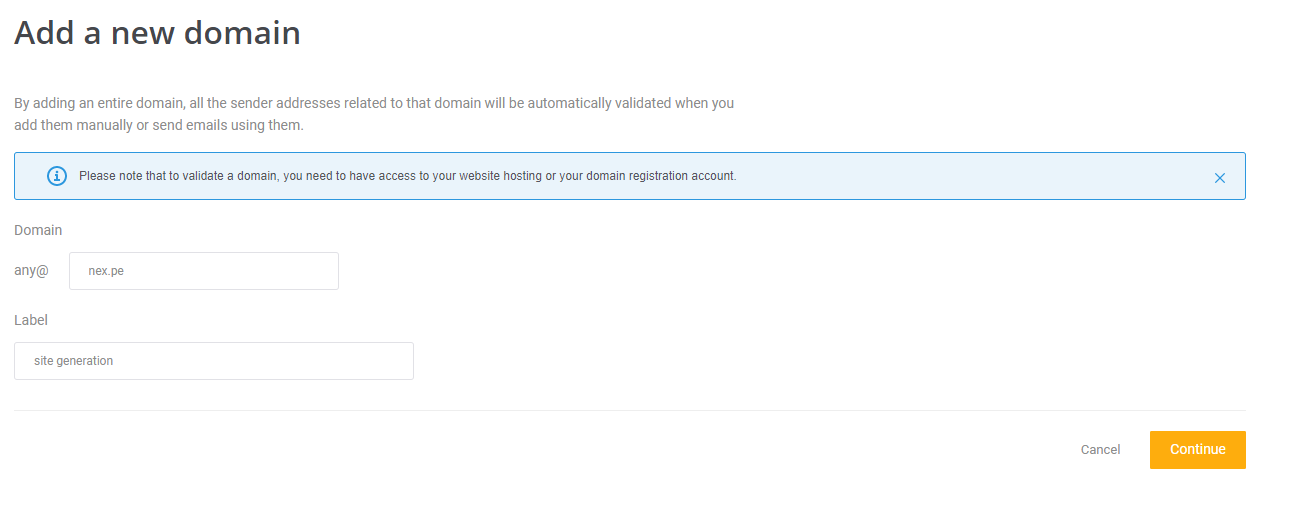 then you have two options to validate the domain. one is uploading a file
and the other is creating a DNS record.for this tutorial, I will try the first
method.
then you have two options to validate the domain. one is uploading a file
and the other is creating a DNS record.for this tutorial, I will try the first
method. 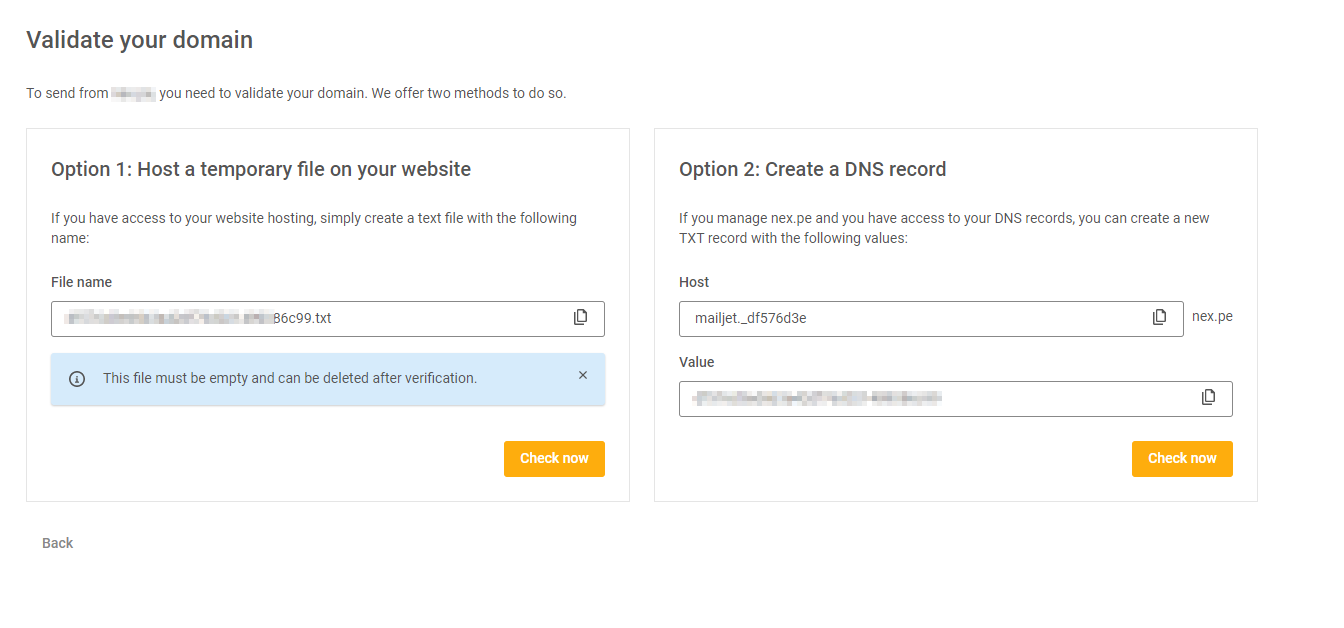 first, I will install Managefy plugin. then once it is installed and activated. go to Managefy option
on sidebar, then create the txt file
first, I will install Managefy plugin. then once it is installed and activated. go to Managefy option
on sidebar, then create the txt file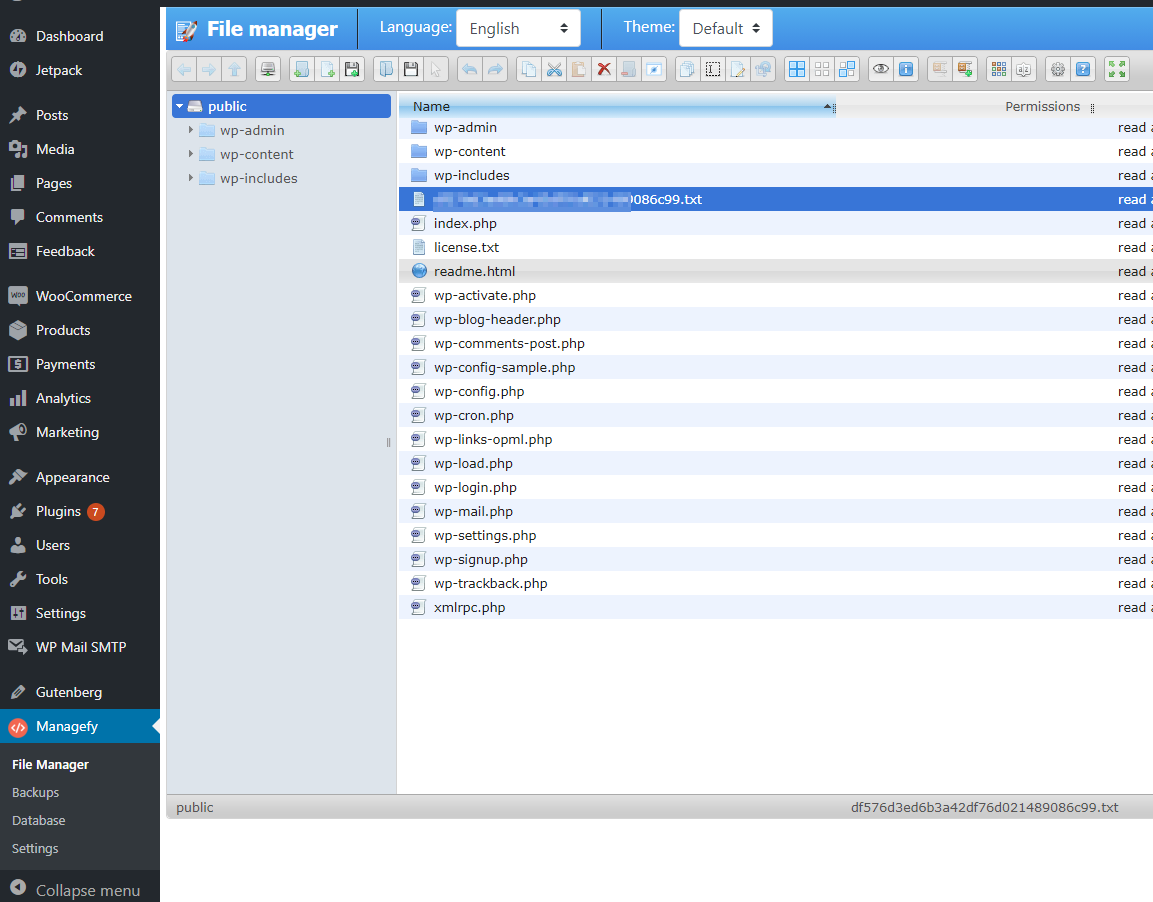 then you can verify it on the url of the browser:
  then on mailjet, press Check now, and you will receive the success
message:
then on mailjet, press Check now, and you will receive the success
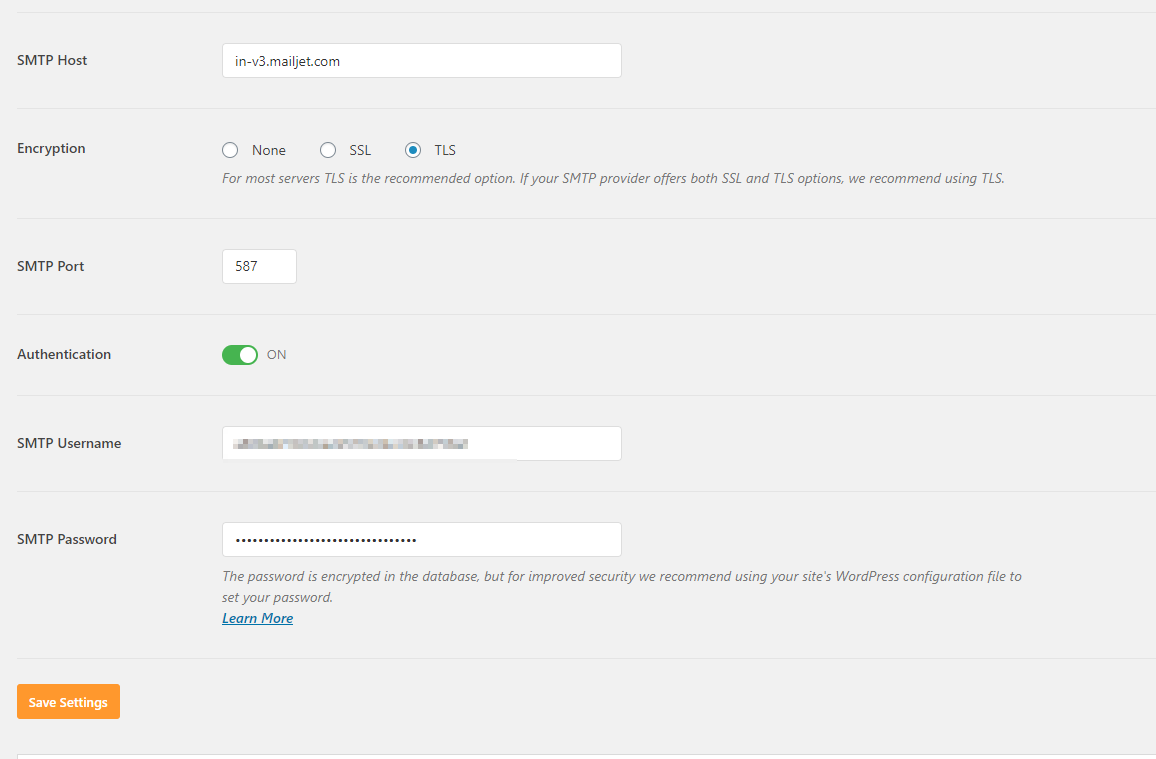
message: 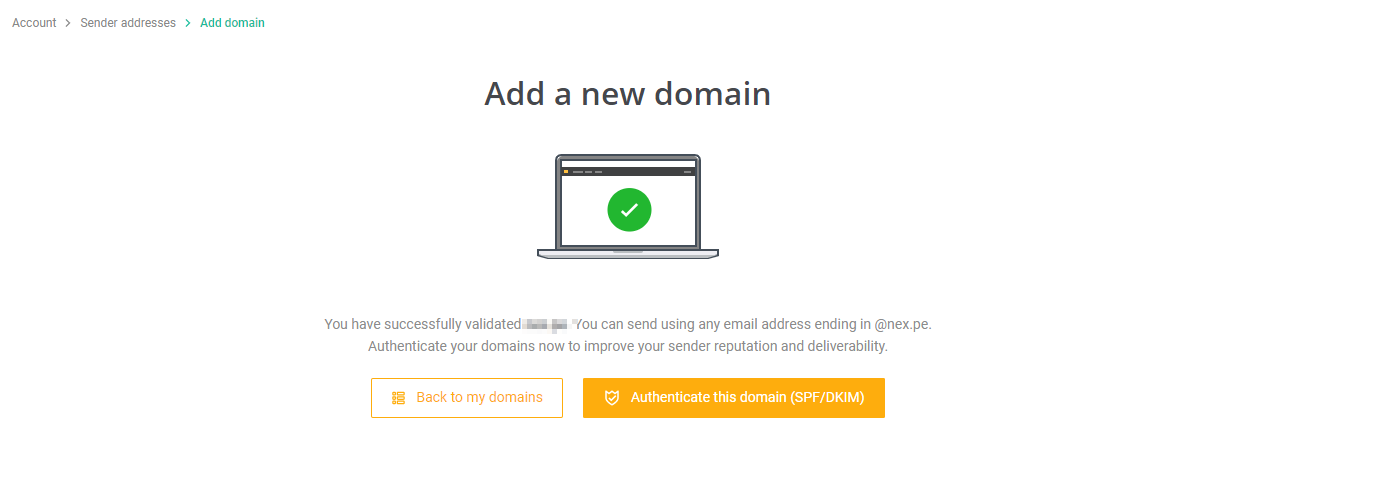 finally your SMTP settings will look like this: