You have the option to set up the Ubuntu distribution alongside Windows 10, allowing you to utilize your preferred Linux tools without the need to switch between computers or resort to a virtual machine. Microsoft aims to attract more developers to code on various platforms, leveraging Windows 10 as their primary tool. To facilitate this, the company has collaborated with Canonical, the creators of Ubuntu Linux, to enhance the command line capabilities within Windows 10. Although Linux integration into Windows 10 is not initially provided, installing Linux distributions becomes straightforward once you establish the Windows Subsystem for Linux 2 (WSL2) platform on your device.
This guide will walk you through the process of installing Ubuntu on Windows 10.
To install Ubuntu on Windows 10, follow these steps:
- Open Start on Windows 10.
- Search for Command Prompt, right-click the top result, and select Run as administrator option.
- Enter the following command to install WSL and Ubuntu Linux on Windows 10 and press Enter: wsl –install
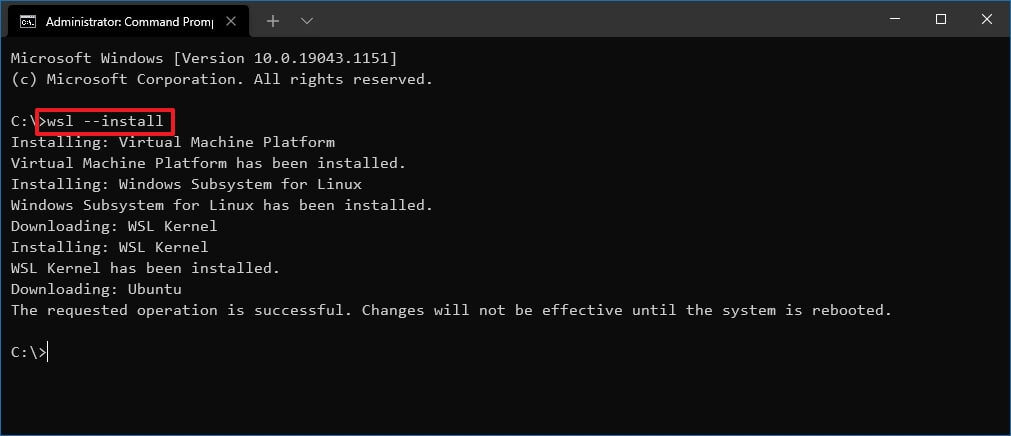
- (Optional) If you already have WSL installed, you can install Ubuntu by entering the following command and pressing Enter: wsl –install -d Ubuntu
- (Optional) To view all available distros, enter the following command and press Enter: wsl –list –online
- (Optional) Type the following command to install a specific version of Ubuntu on Windows 10 and press Enter: wsl –install -d UBUNTU-VERSION In the command, change “UBUNTU-VERSION” to the name of the version you want to install. This example installs version 20.04: wsl –install -d Ubuntu-20.04
- Restart your computer to finish the WSL and Ubuntu installation.
- Continue with the Linux distro setup as necessary.
Once you’ve followed these steps, the Linux distribution will be installed on your computer. Installing Ubuntu on Windows 10 from Microsoft Store: To install Ubuntu on WSL via the Microsoft Store on Windows 10, follow these steps:
- Open Start.
- Search for Turn Windows Features on or off and open the Windows Features settings.
- Enable the “Virtual Machine Platform” and “Windows Subsystem for Linux” options.
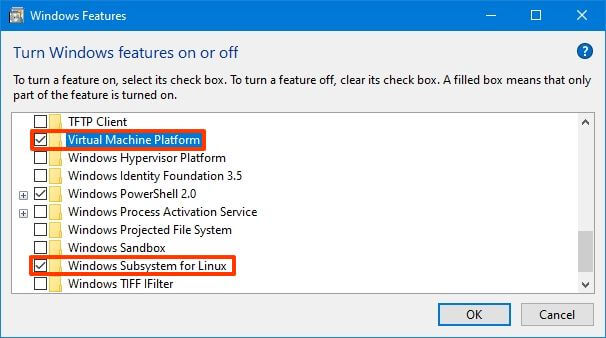
- Click OK and then Restart now.
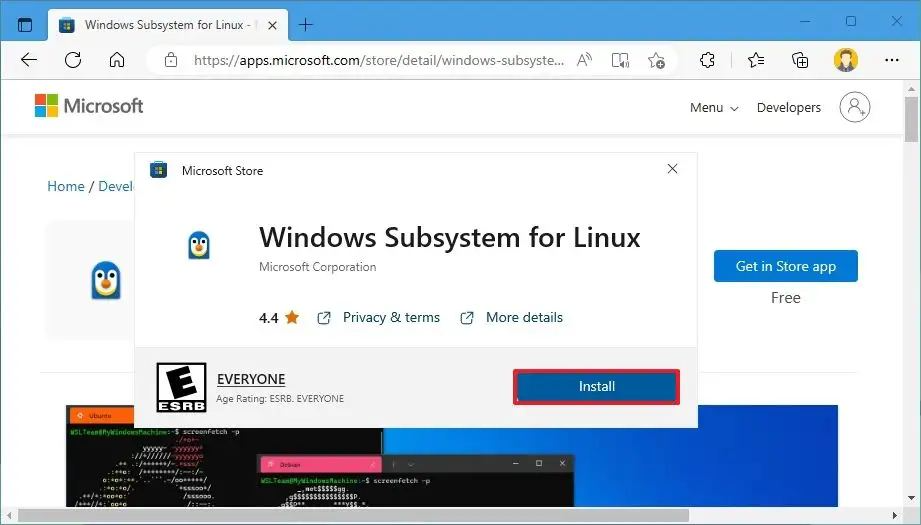
- Open the WSL store page and click “Get in Store app.”
- Click Install.
- Open the Ubuntu store page (e.g., “Ubuntu 22.04 LTS”) and click “Get in Store app.”
- Click Install.
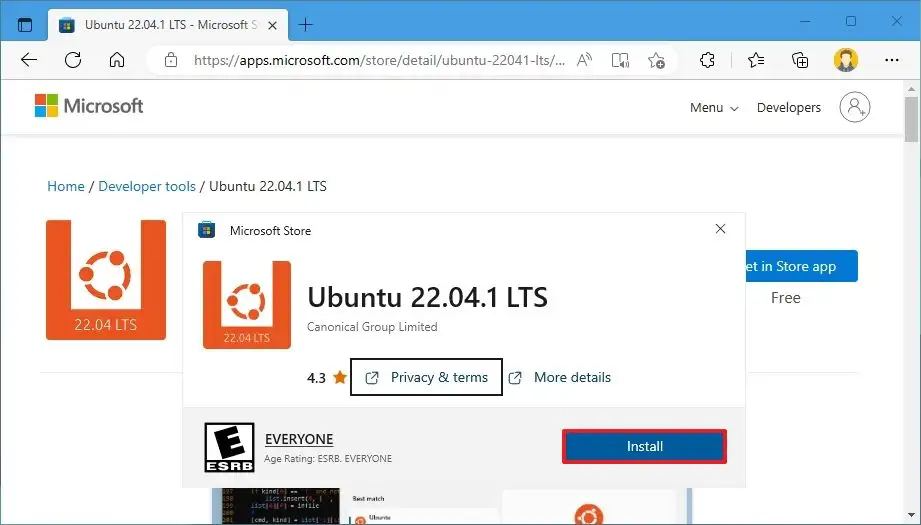
- Click Open to start Ubuntu on Windows 10.
- Follow the on-screen instructions to complete the setup.
Once you’ve completed these steps, you can begin using the Linux terminal on Windows 10 to access various applications, such as Git, Ruby, Python, grep, awk, sed, and more. For command reference, you can refer to the Microsoft documentation page.

